resources used:
- pattern is from https://dr-cos.info/fp-cummervest.html (may need an address in japan to order, even for digital patterns)
- only handmade pieces are vest, brooch, and pipe; the rest are thrifted basics
- belt is from amazon
- wig is from ardawigs
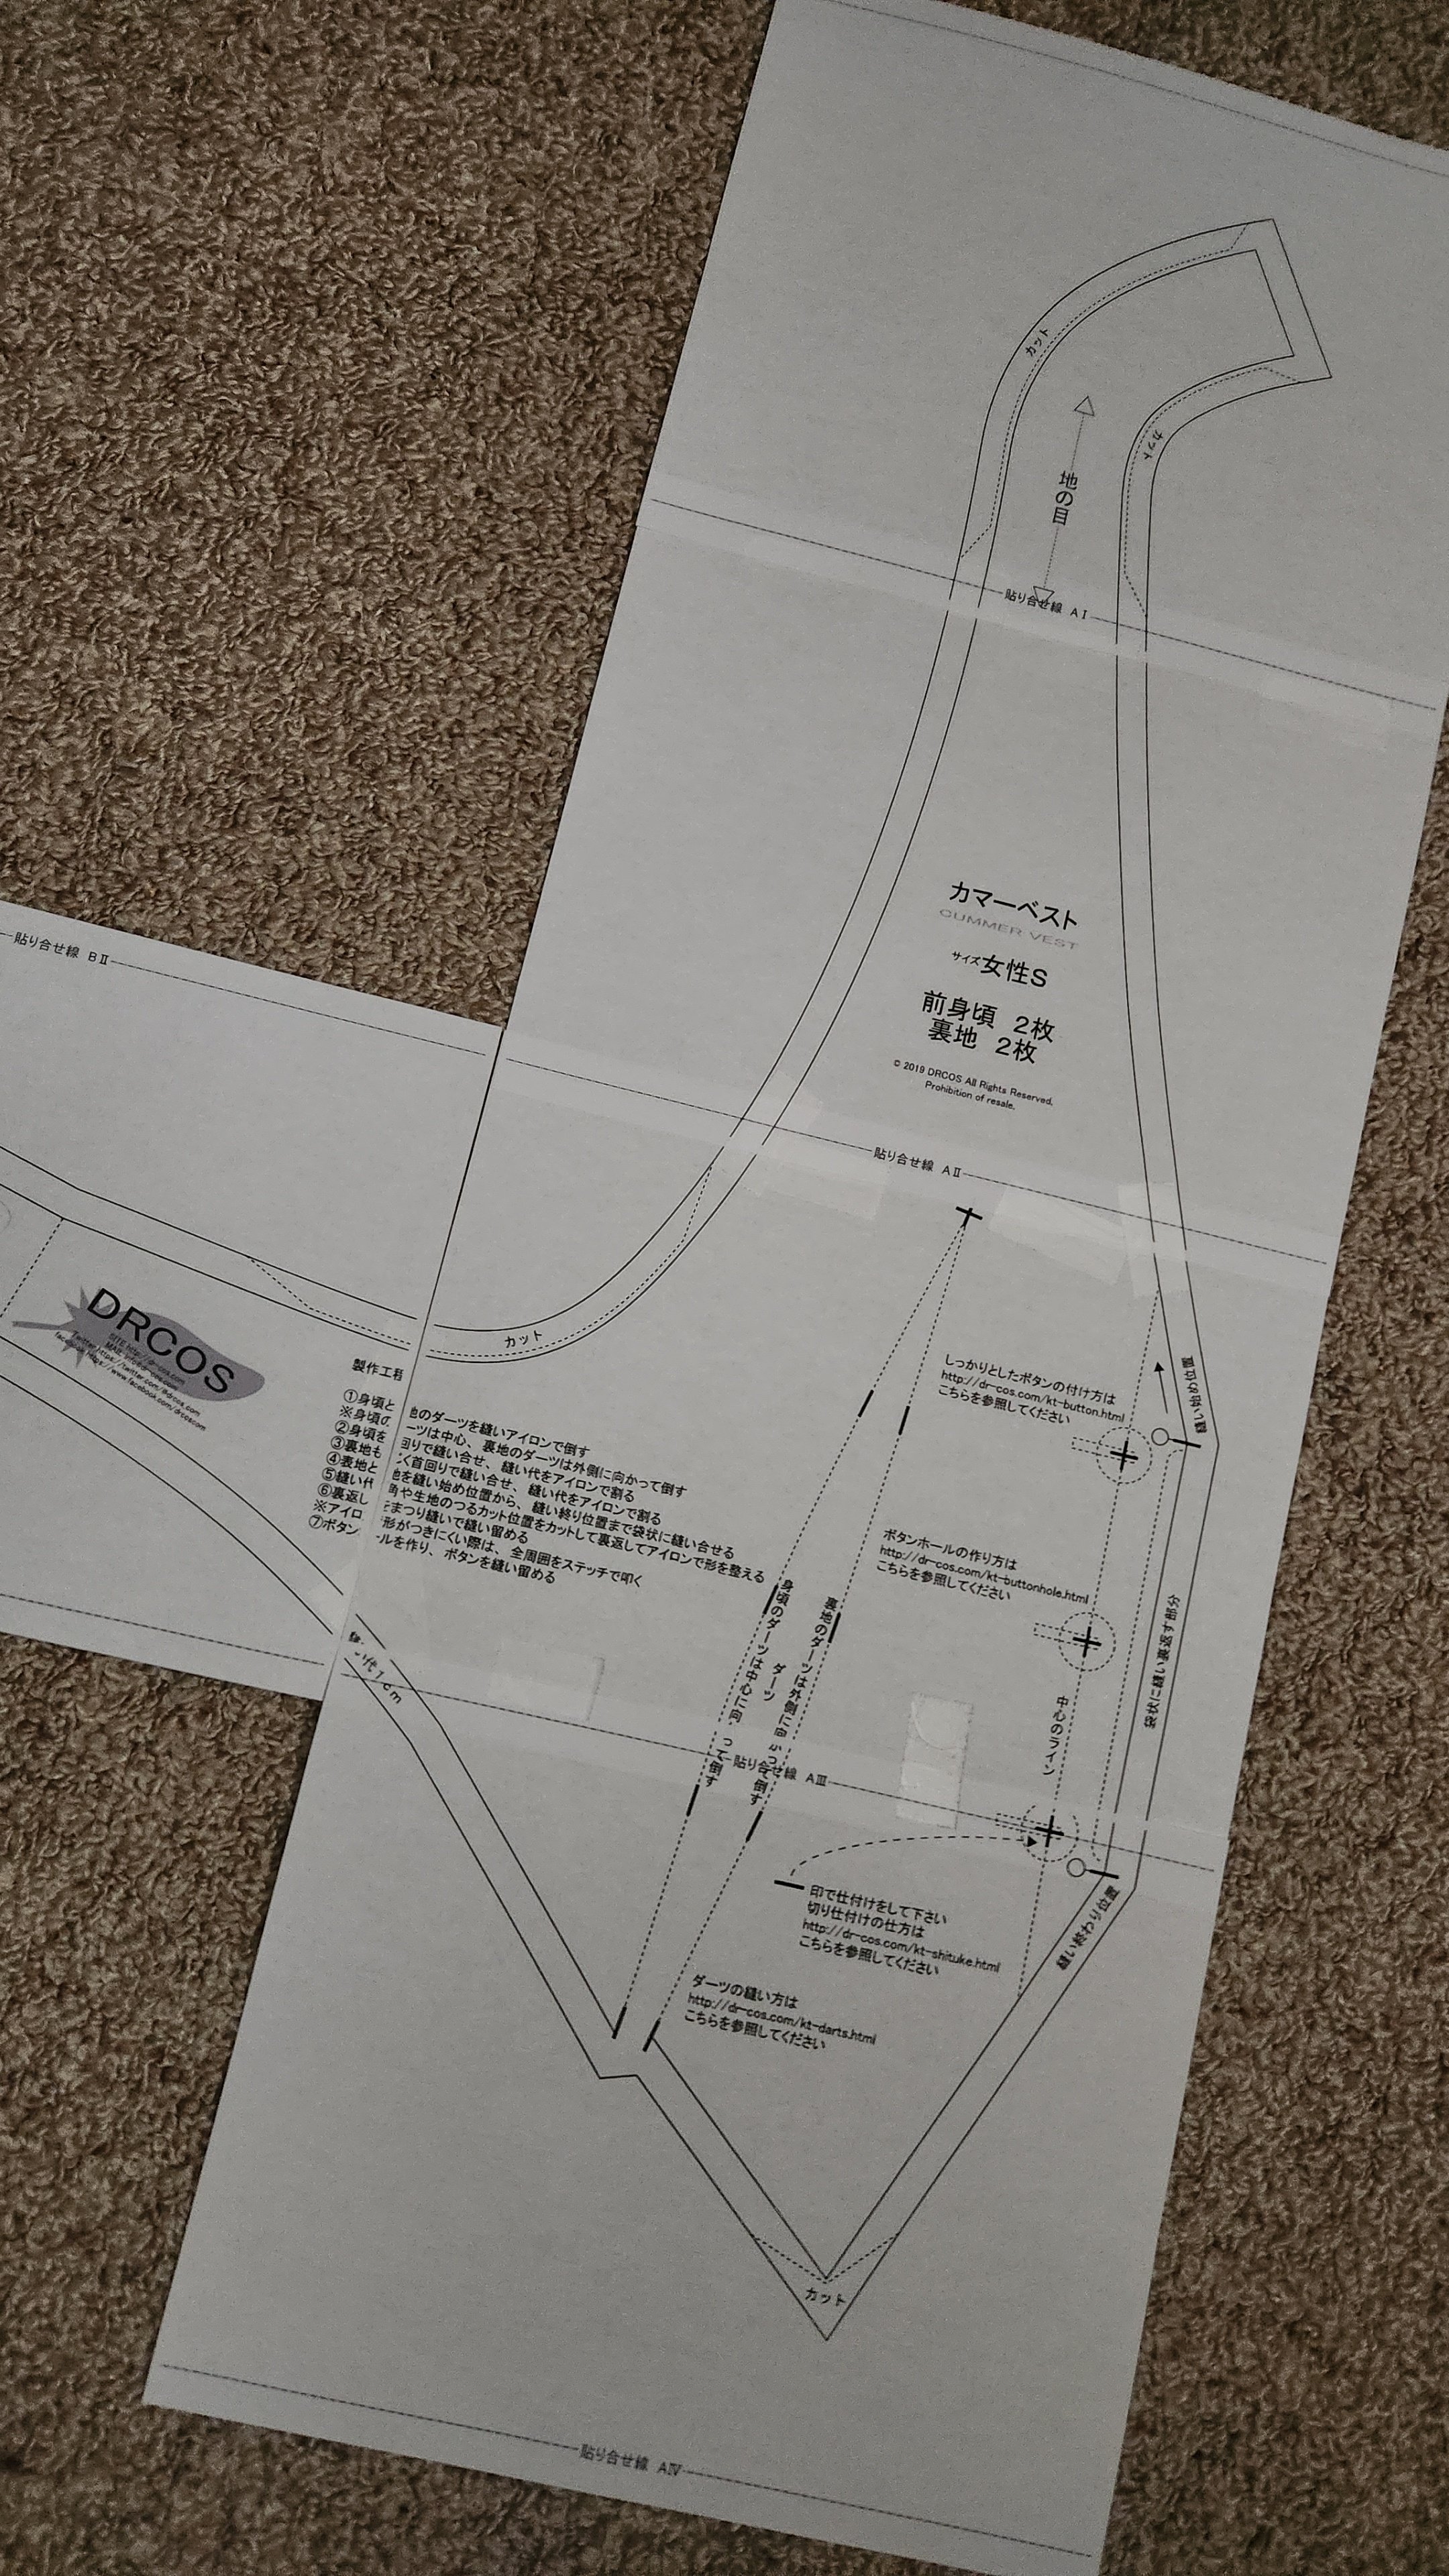
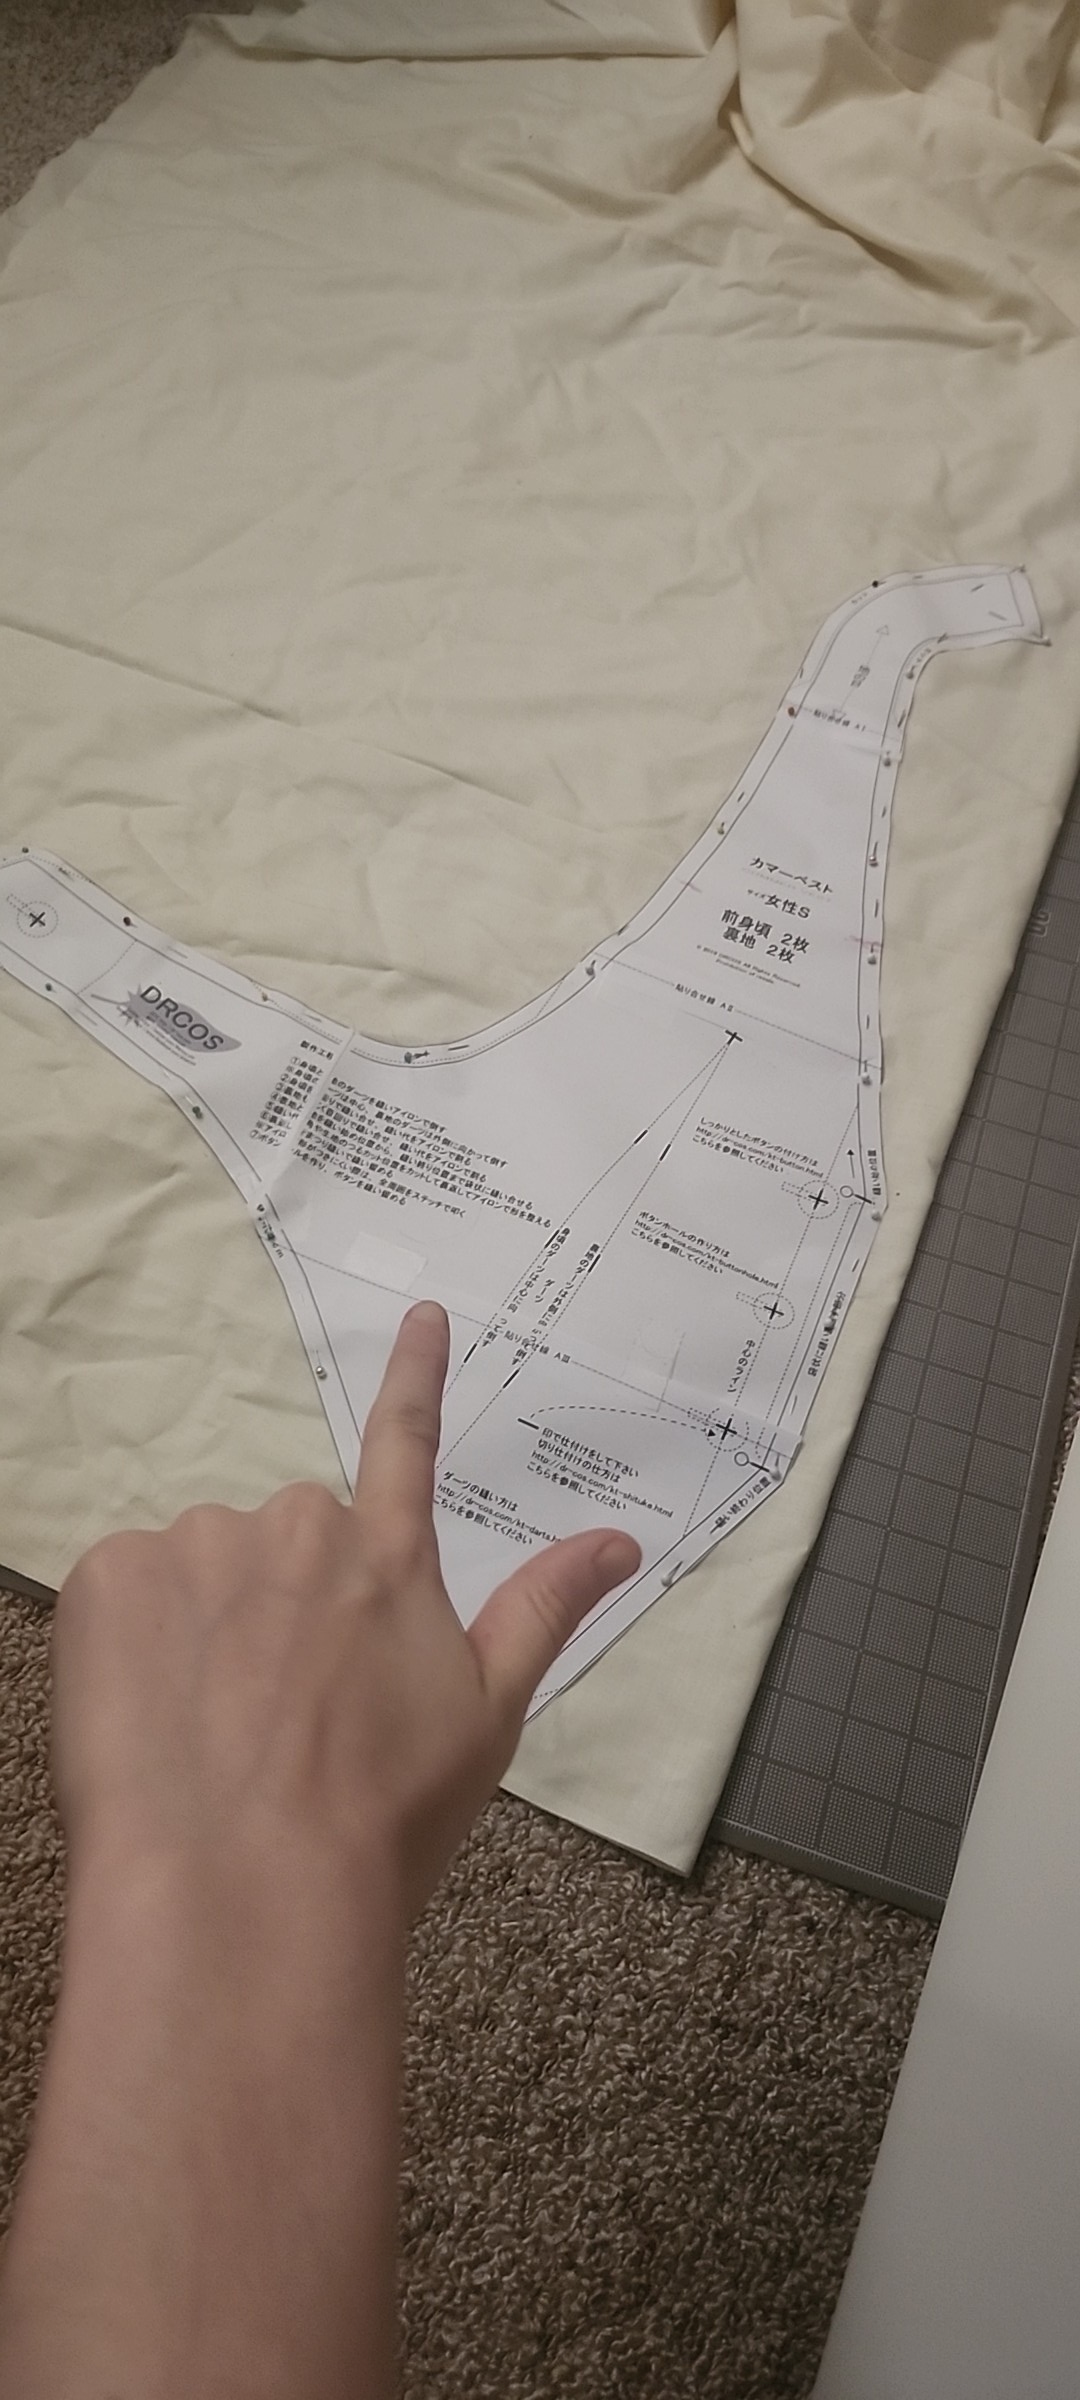
printed, cut, and taped pattern onto muslin scraps for fitting (that's why i didn't iron it. rip). since shy's vest has the plaid bottom half and the back neck part/top half, i basically cut the pattern horizontally across the breast and added a seam allowance to each cut face (about 1cm). i also decided that i didn't want a button on the back part, but i also didn't want to make the more complex back fastening shown on shy's mahoste vest... so i ended up attaching a simple slide buckle onto one end of the back strap to make it a little more adjustable
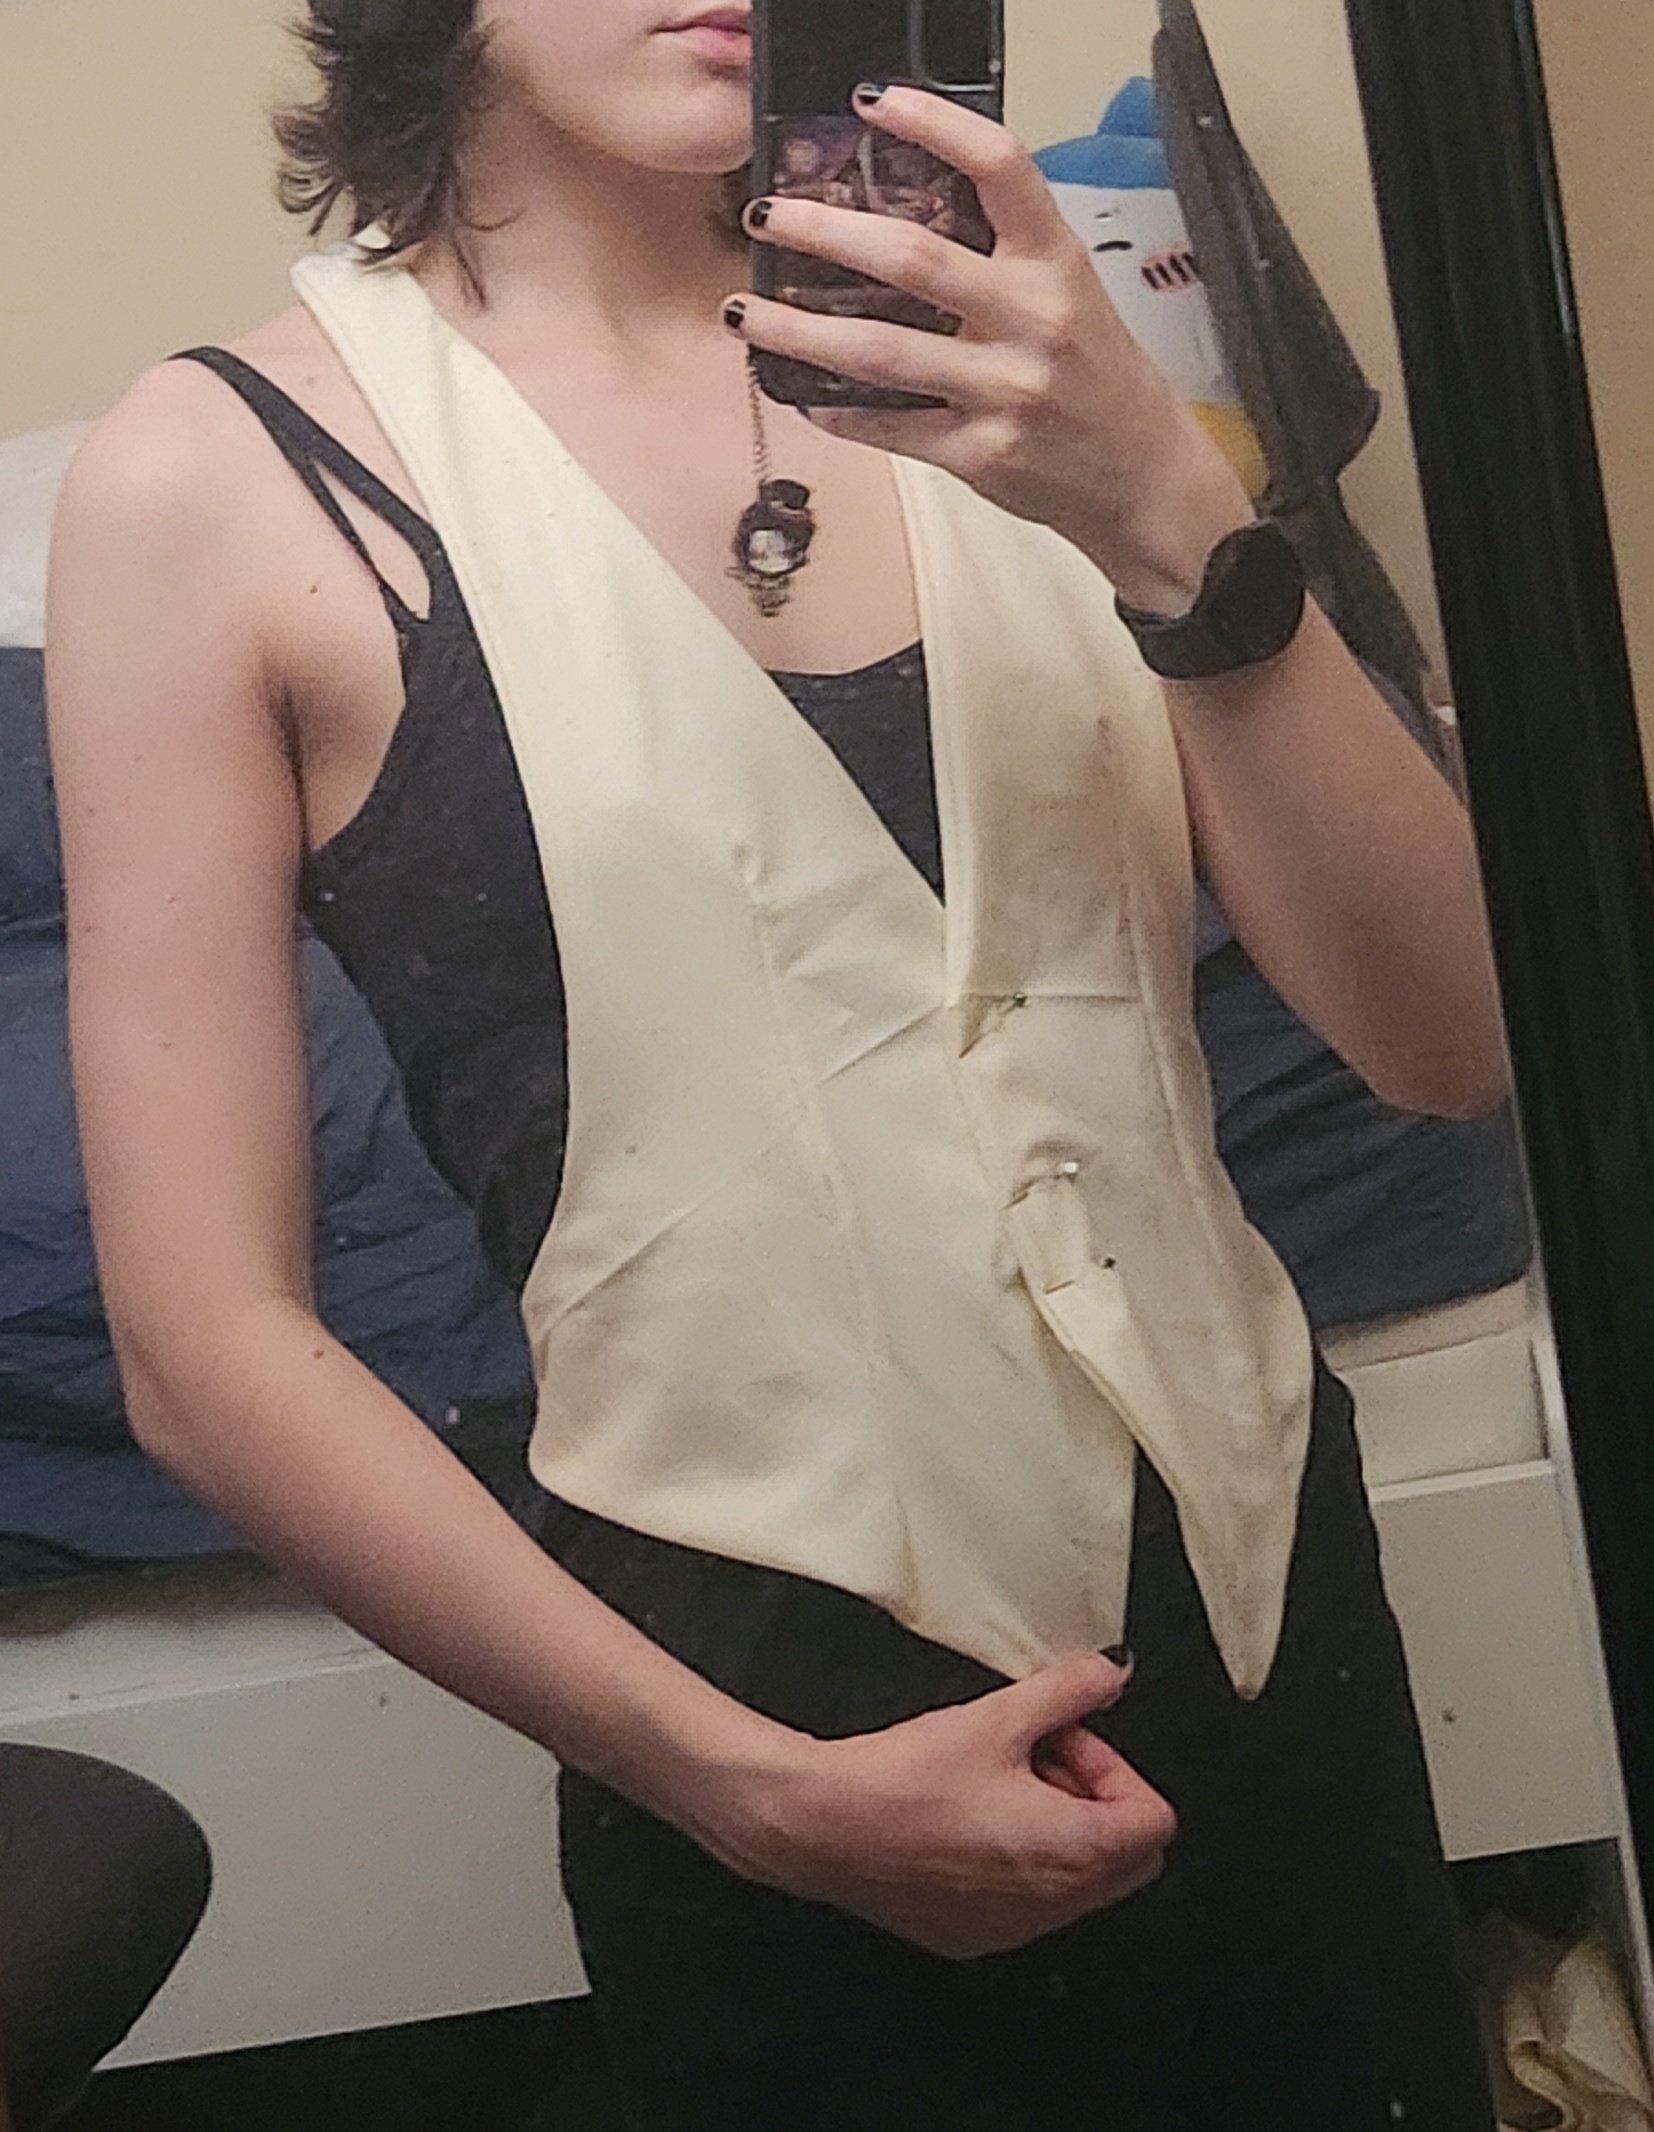
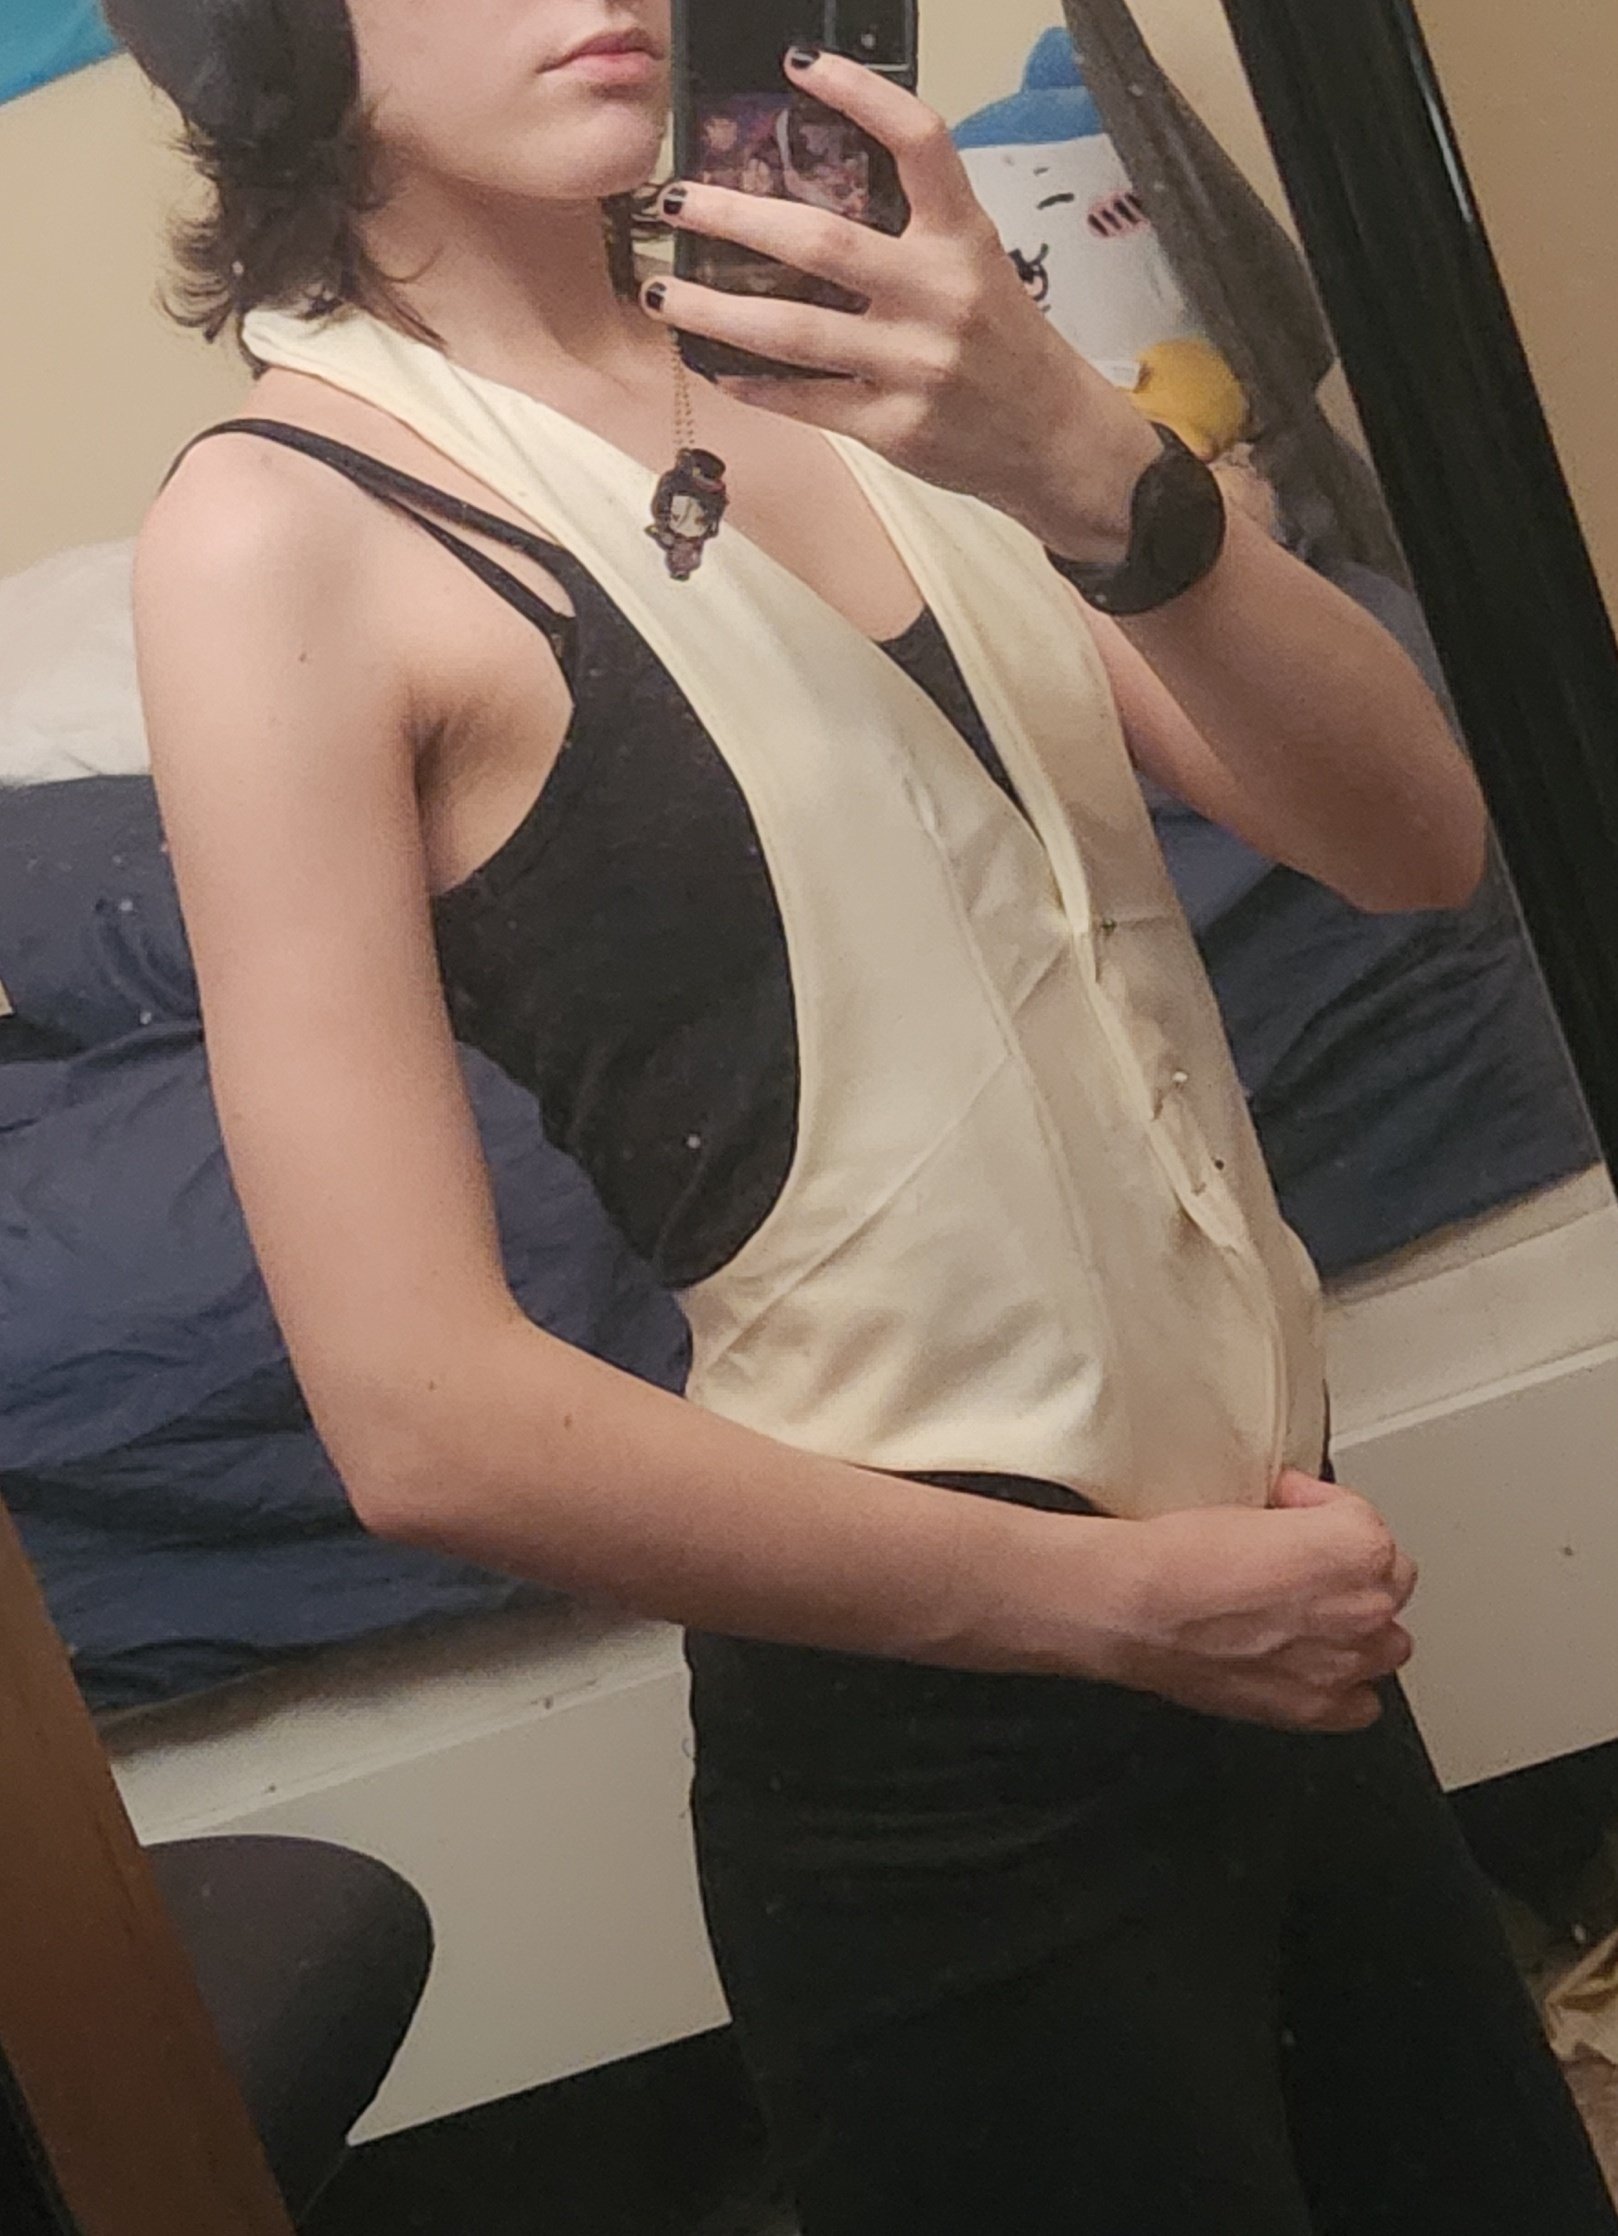
pinned for a tissue fit! i then realized that i needed to make this a full mockup so i could get a better idea of how the vest would lay with more bulk on & under it. it's a learning experience...
looks a lot better after making it a real mockup! basted but not ironed, and buttonhole areas pinned in place.
after the fitting & considering some logistics, here are the adjustments i ended up making:
- - lengthened & narrowed the lapels/part going up the neck by adding about an inch or two above the cross-chest seam, and taking a bit of width off in the front-armpit area. this also made the whole piece sit a bit lower around my waist so this might not be feasible for everyone!
- - ...made the darts actually even (i had basically freehanded them into an approximate spot after adding the extra length)
- - flattened the curve of the neck piece so it laid more nicely around my neck with less gapping. if you notice this problem later in the process i imagine you could just stick some darts into it lol
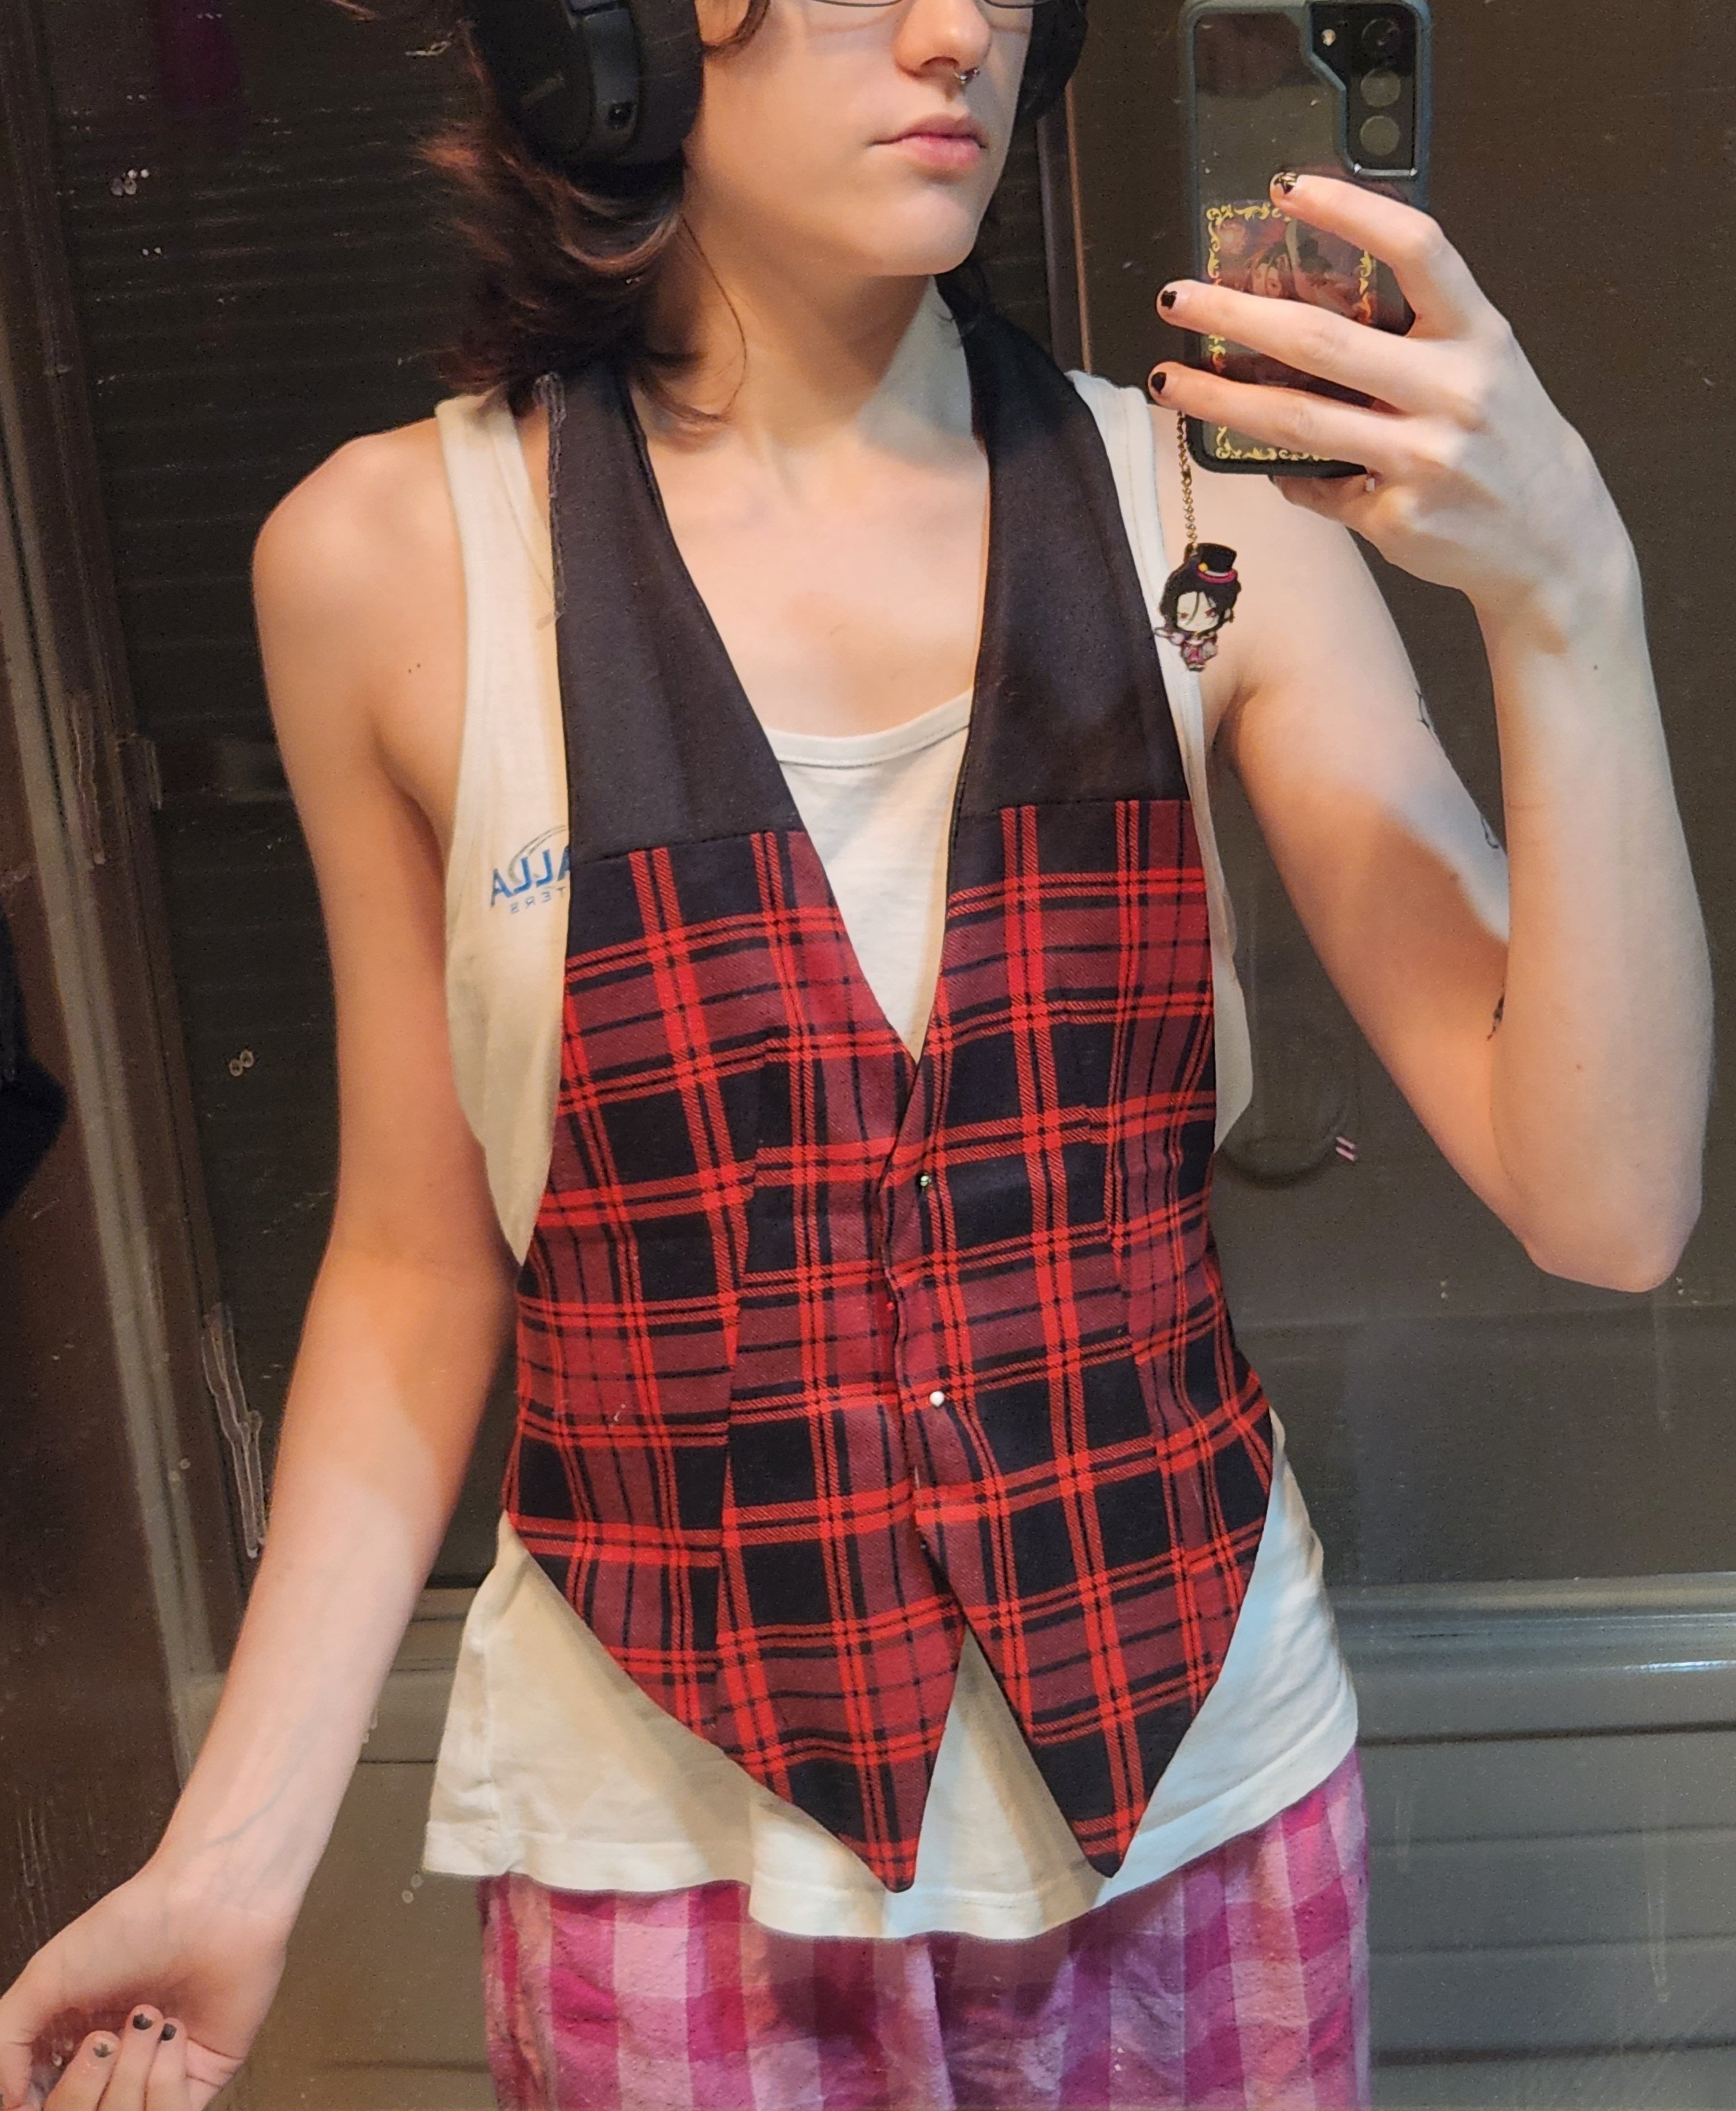
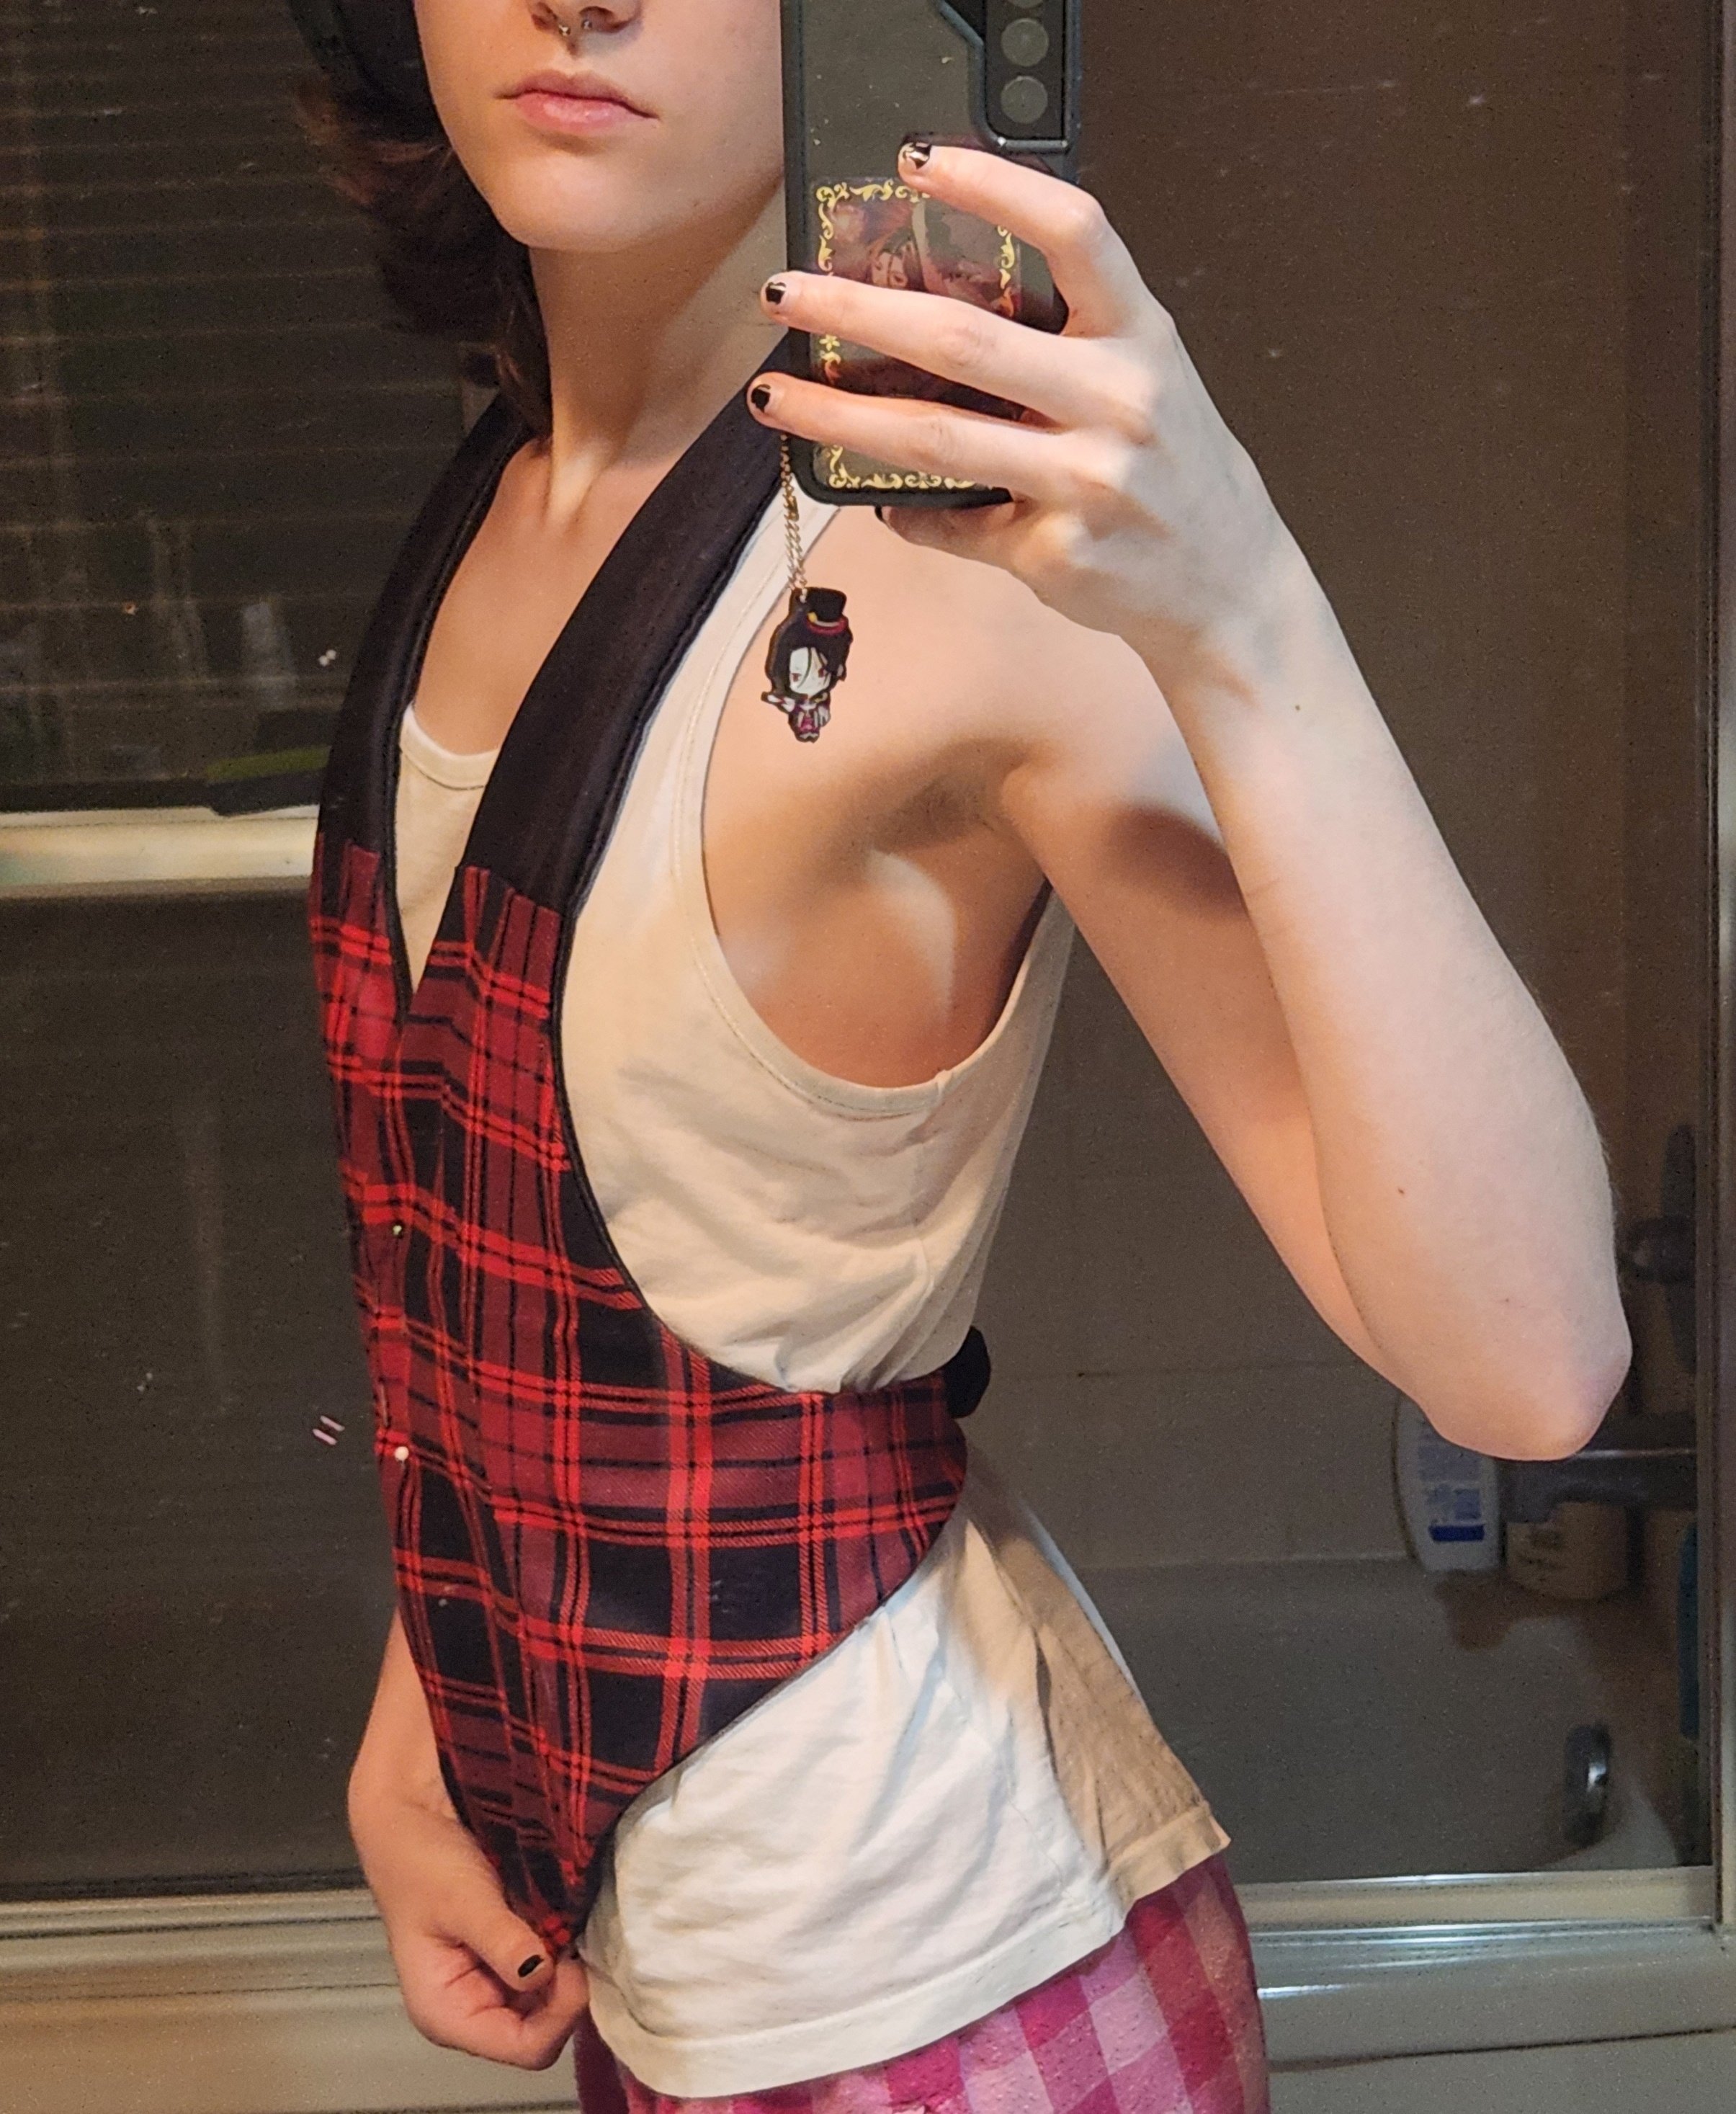
sudden jump to the assembled vest! i forgot to take most pictures of this whoops. first i stitched the black tops + patterned bottoms together along my new chest seam, then i did all the rest of the assembly basically according to the instructions from the pattern. since the pattern was in japanese, this required some google translating & research...
everything here was basically pretty easy. i did have some difficulty turning the vest right-side-out because i had to pull a lot of fabric through the narrowed neck tube, so um, keep that in mind, especially if you're working with larger sizes that would have more fabric involved! i also didn't trim the darts/seam allowances on the inside curves of the neck part down enough so they were a teeny bit bulky. that was my bad though, i forgot to re-add them after adjusting the pattern.
in hindsight, i should have maybe tried to align the fabric pattern so the lines on the plaid wouldn't pucker and intersect weirdly, but tbh i have no idea if that is... at all feasible to do? and it worked out just fine for my purposes, so i'm happy! i also considered topstitching the edges but decided it looked good without it. i bet this outfit would look really nice with some embroidery/decorative stitching as well.... the world is your oyster....
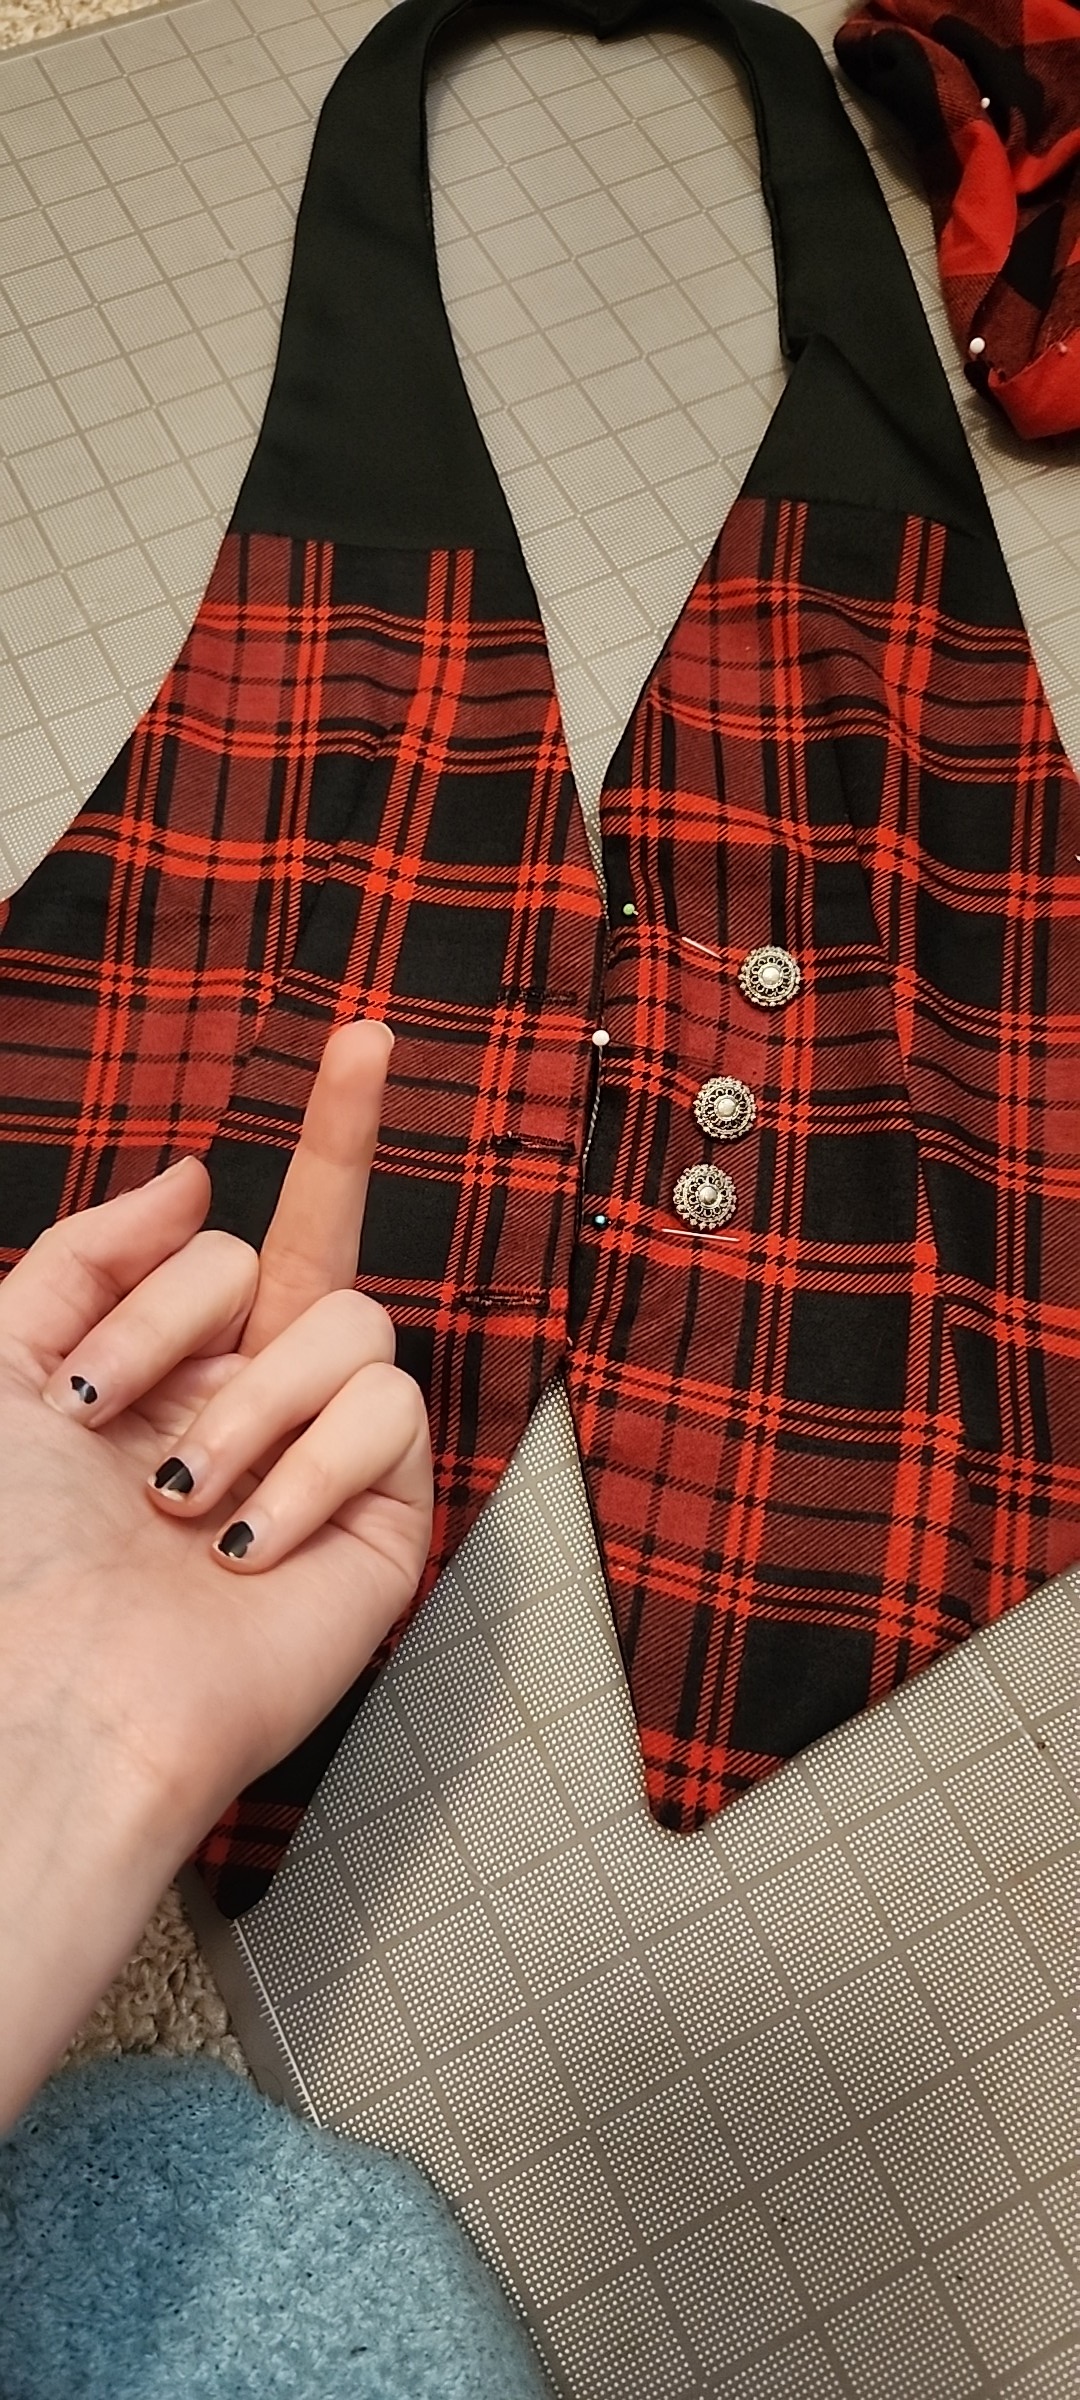
attaching the buttons and getting very mad at the fact that i was con crunching by now LOL. at this point i had also attached the slider buckle to the back part, so it was perfectly adjustable and pretty secure - a button would have been more secure but i think this looked better and held up basically just as well. maybe consider a different adjustable bit if you plan on doing anything more strenuous than con wandering!
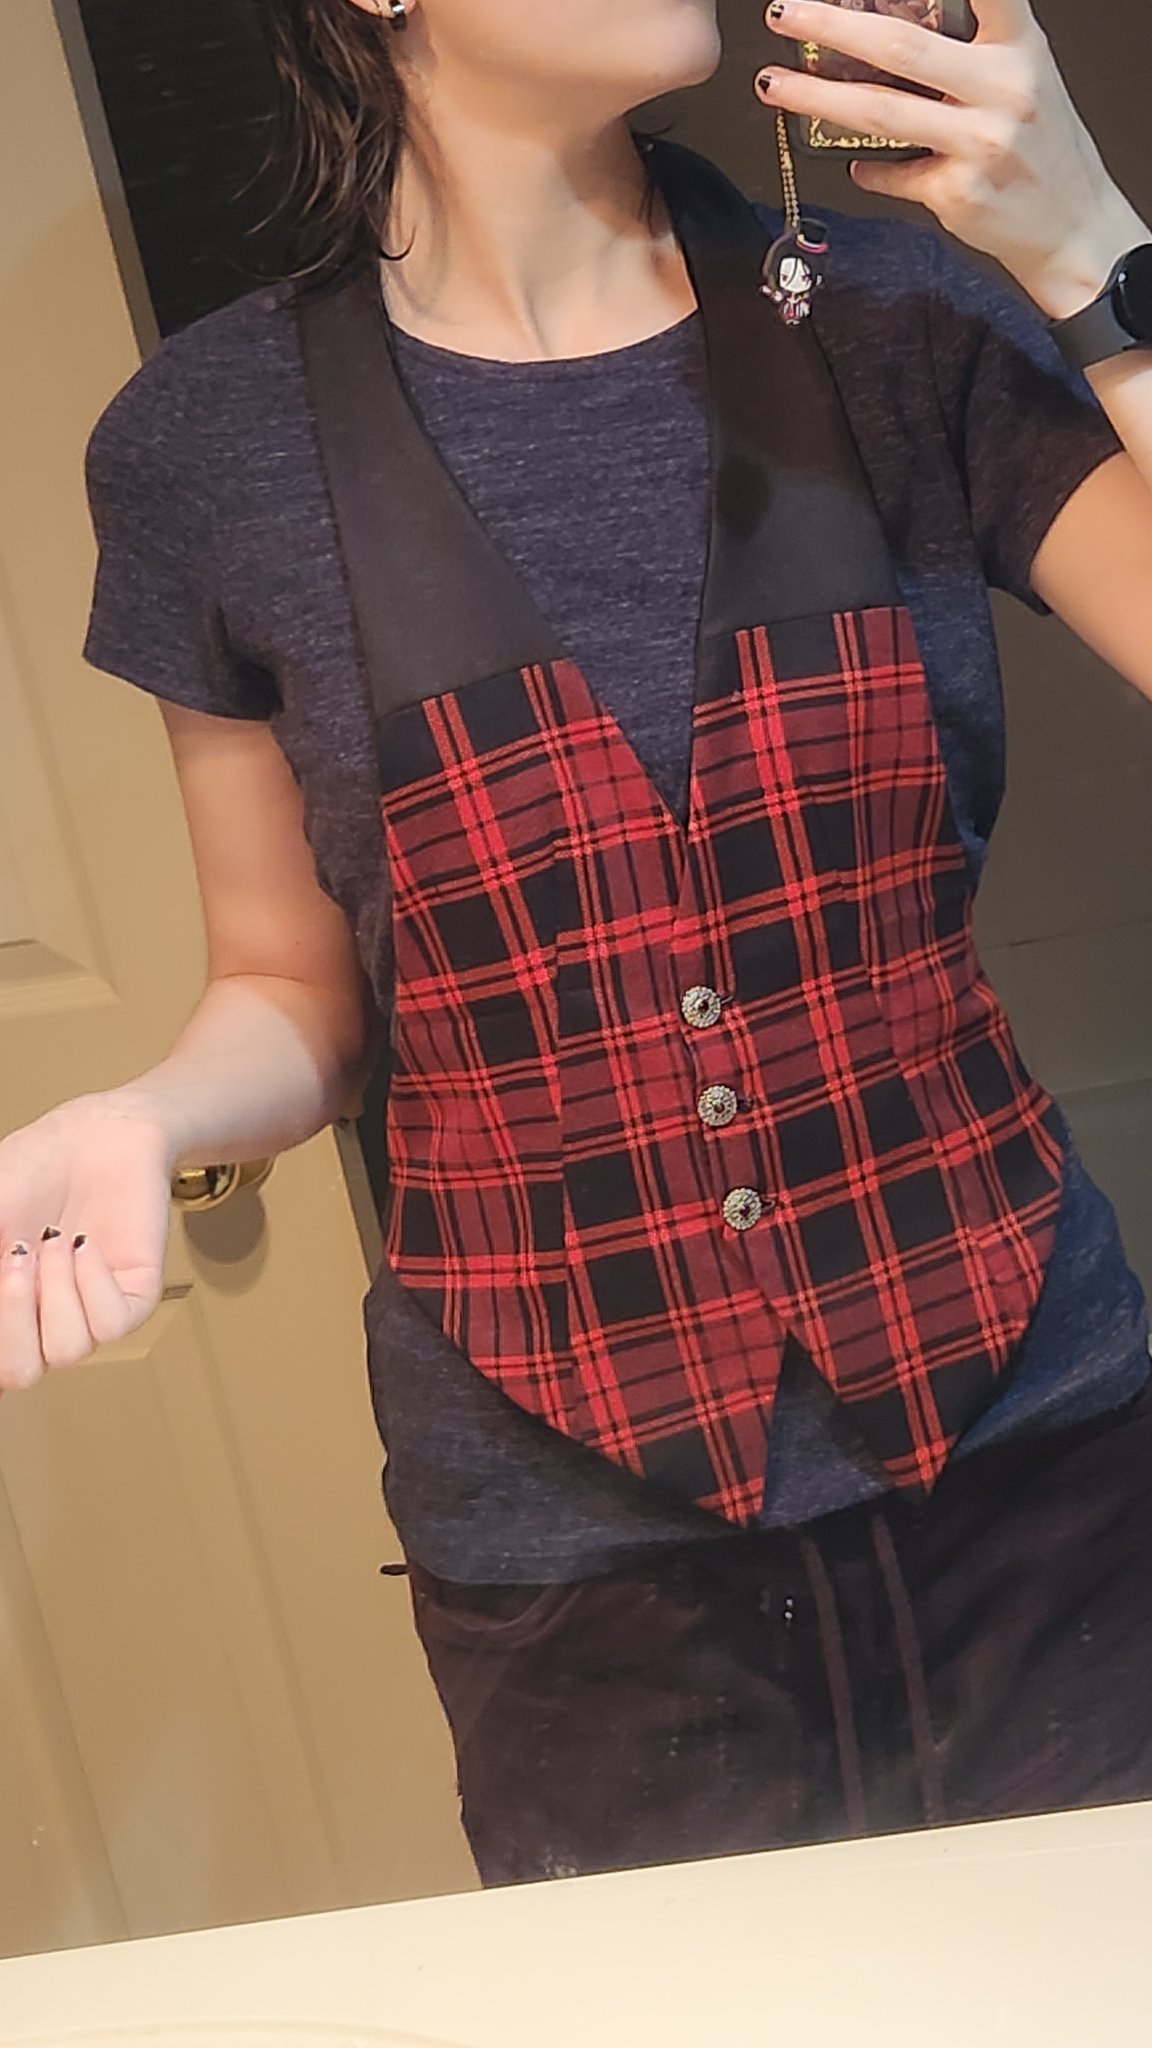
buttons on! these buttons were just little plastic things i got at the fabric store, with dollar store rhinestones pressed into the center, and i'm genuinely so happy that it ended up looking so elegant ;w; i also remembered to iron it in this step so we are looking CRISPPP. but with that the vest was basically good to go so let's get on with the accessories!!!

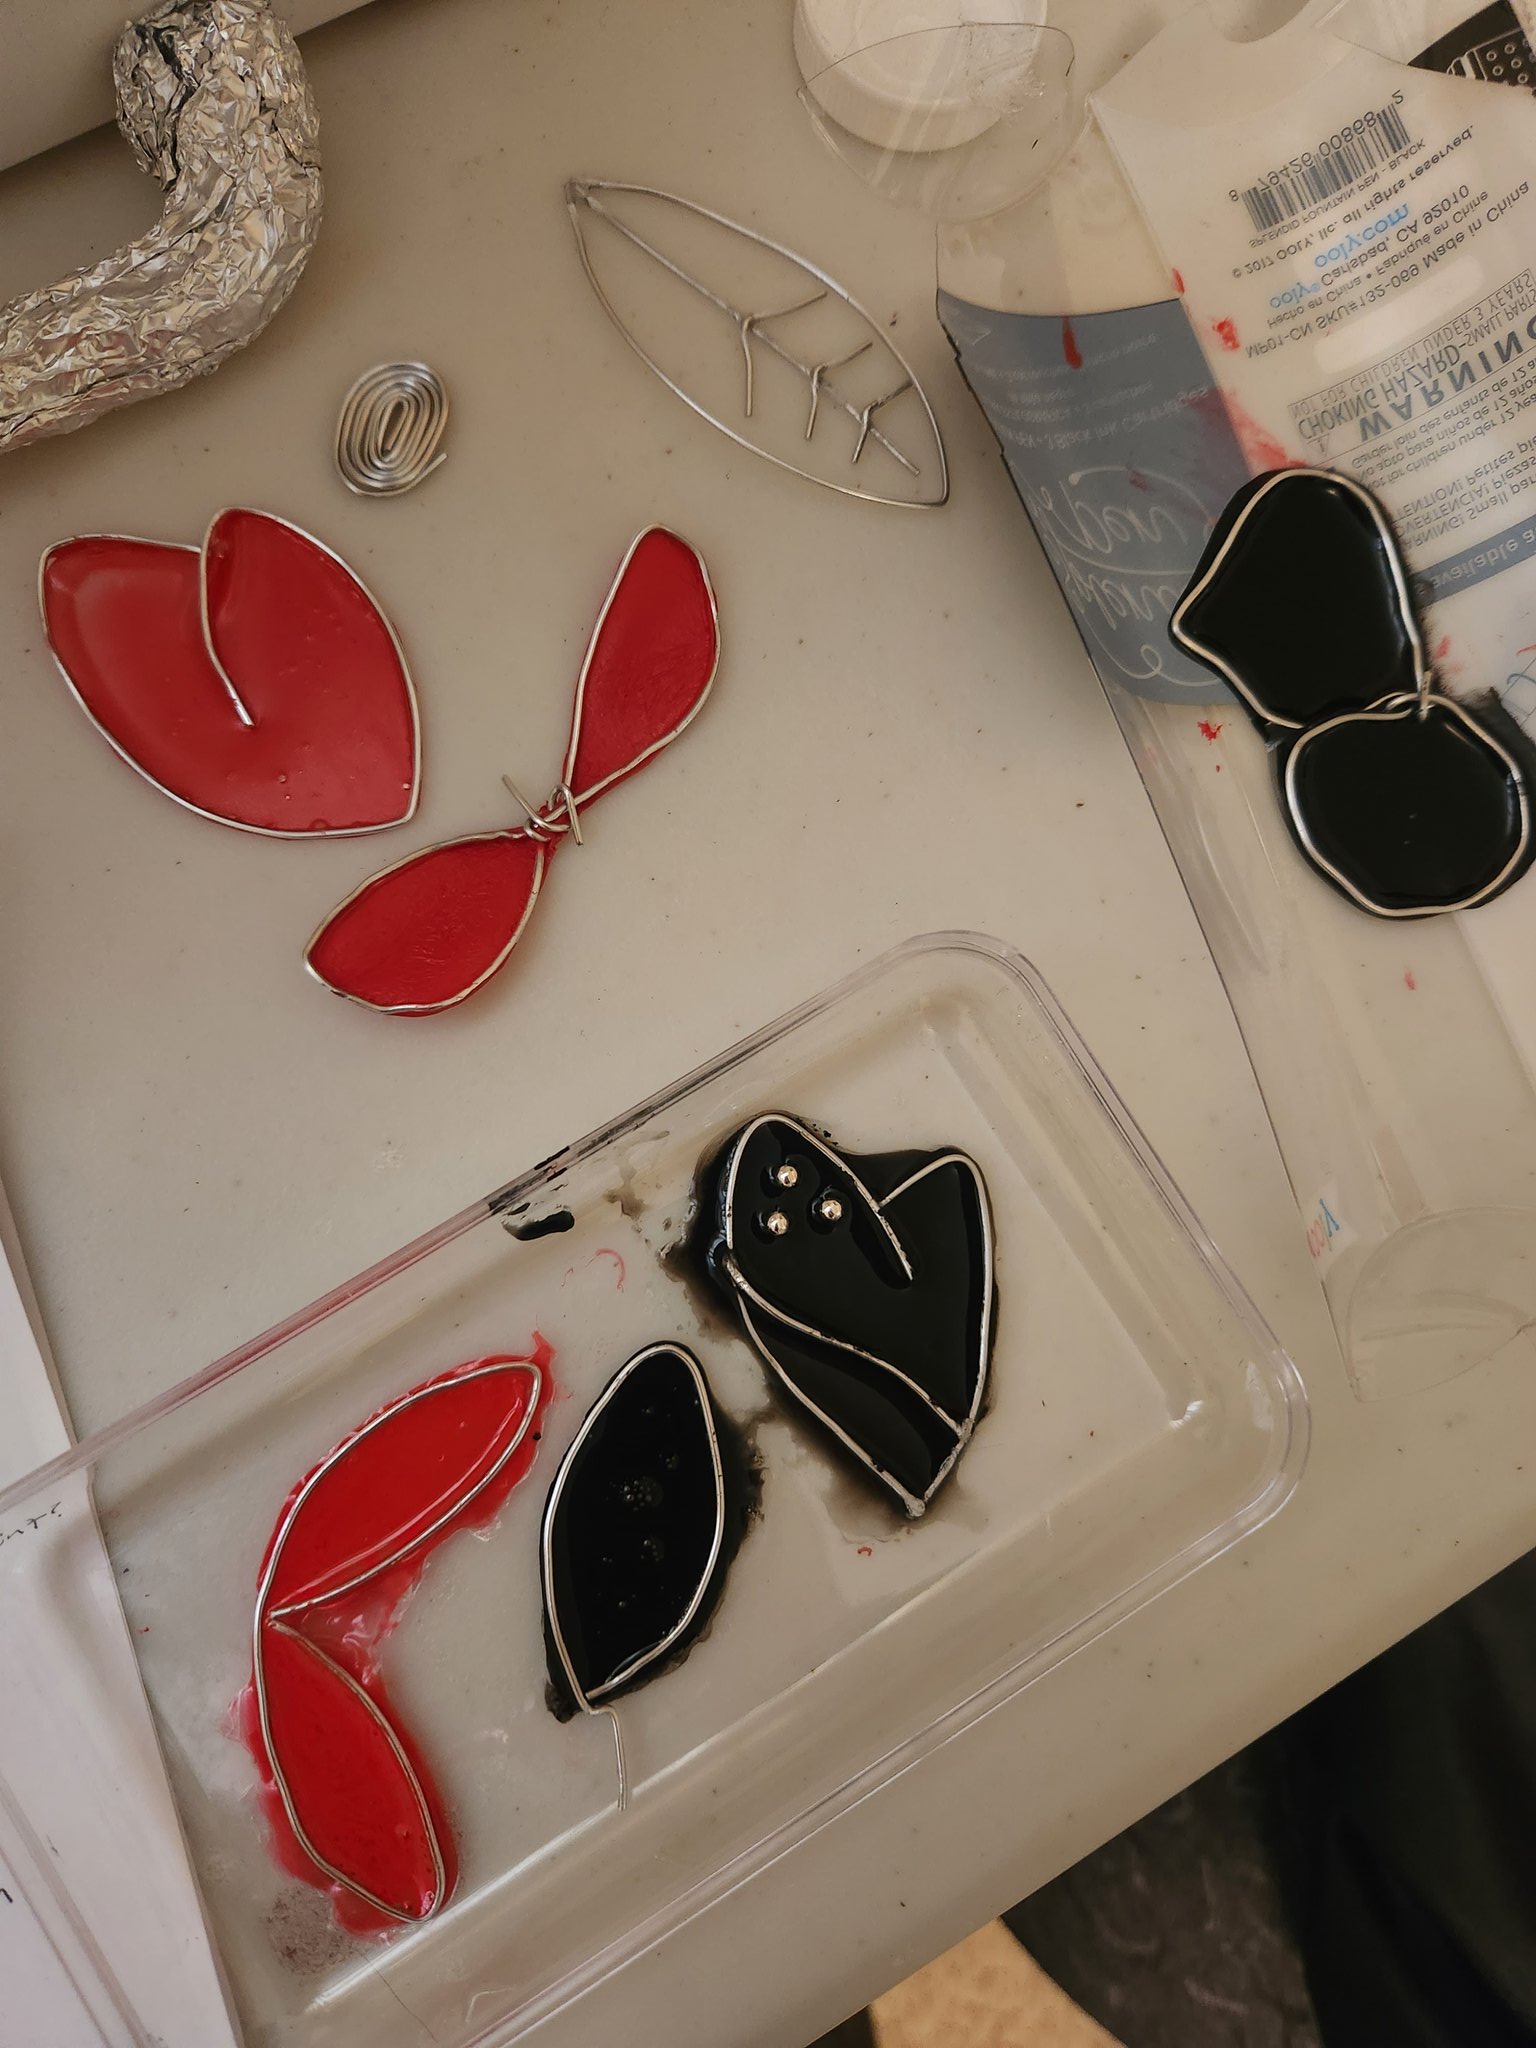
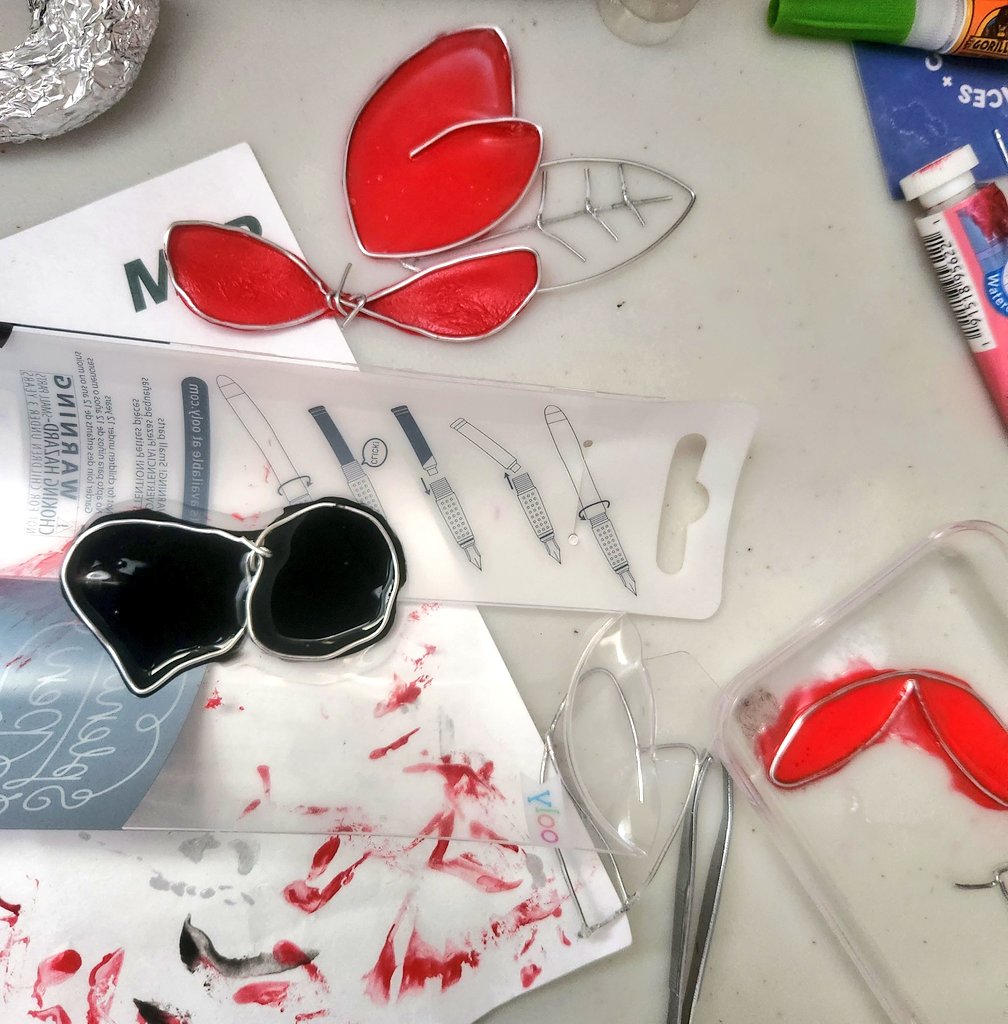
ok. good lord the brooch. this was probably the most labor-intensive part of the whole thing and mostly because i was broke and didn't have access to anything like resin, acrylic, or 3d printing. i really had to flex my dollar store skills here ;;
basically the idea was to have a wire frame and then fill it in with... something... to kind of emulate a stained/poured glass look. for the front petal with the three dots, i just used round silver beads and set them into the glue when it was partially dry. for this, resin and other tougher materials were out of my skill & affordability range, so i considered everything from tissue paper to nail polish. eventually, i ended up using clear-dry craft glue mixed with acrylic paint, and on some pieces after it had dried i gave them a thin coat of nail polish to help waterproof the pieces... because the craft glue i used was water-soluble lol. Found that one out the hard way too.......
anyways here are my tips if you decide to try this
- glue + water + paint = more glassy/shiny/translucent, but it dried more slowly, was more fragile, and was more likely to pool and pigment unevenly.
- using straight glue with a dab of paint mixed in gave my favorite result; the most resilient while retaining plenty of flexibility
- you probably won't be able to put another coat of paint/glue on, because the fresh stuff will re-wet the old stuff and make it goopy again :(
- the more paint you use, the stronger your pigment will be, but i noticed that more paint would change the texture of the paint-glue mix; it might have been the type of paint i was using too, but for me especially the black acrylic paint got silty and flaky the more i added in.
- the glue pieces themselves were resilient but they didn't adhere to the wire frame that well, predictably. might be able to remedy this by either gently scoring the wire for better surface area, but i just put superglue at the border of every petal piece after all the glue had dried.
- do this on a nonporous surface - ideally smooth plastic or even a silicone hot glue mat. i did mine on a curved piece of trash plastic i had LOL which is why some of it looks jank. don't be like me kids. use smooth trash in your crafts. anyways be careful when lifting the dried pieces off the surface so they don't peel away from the wire frame or tear!
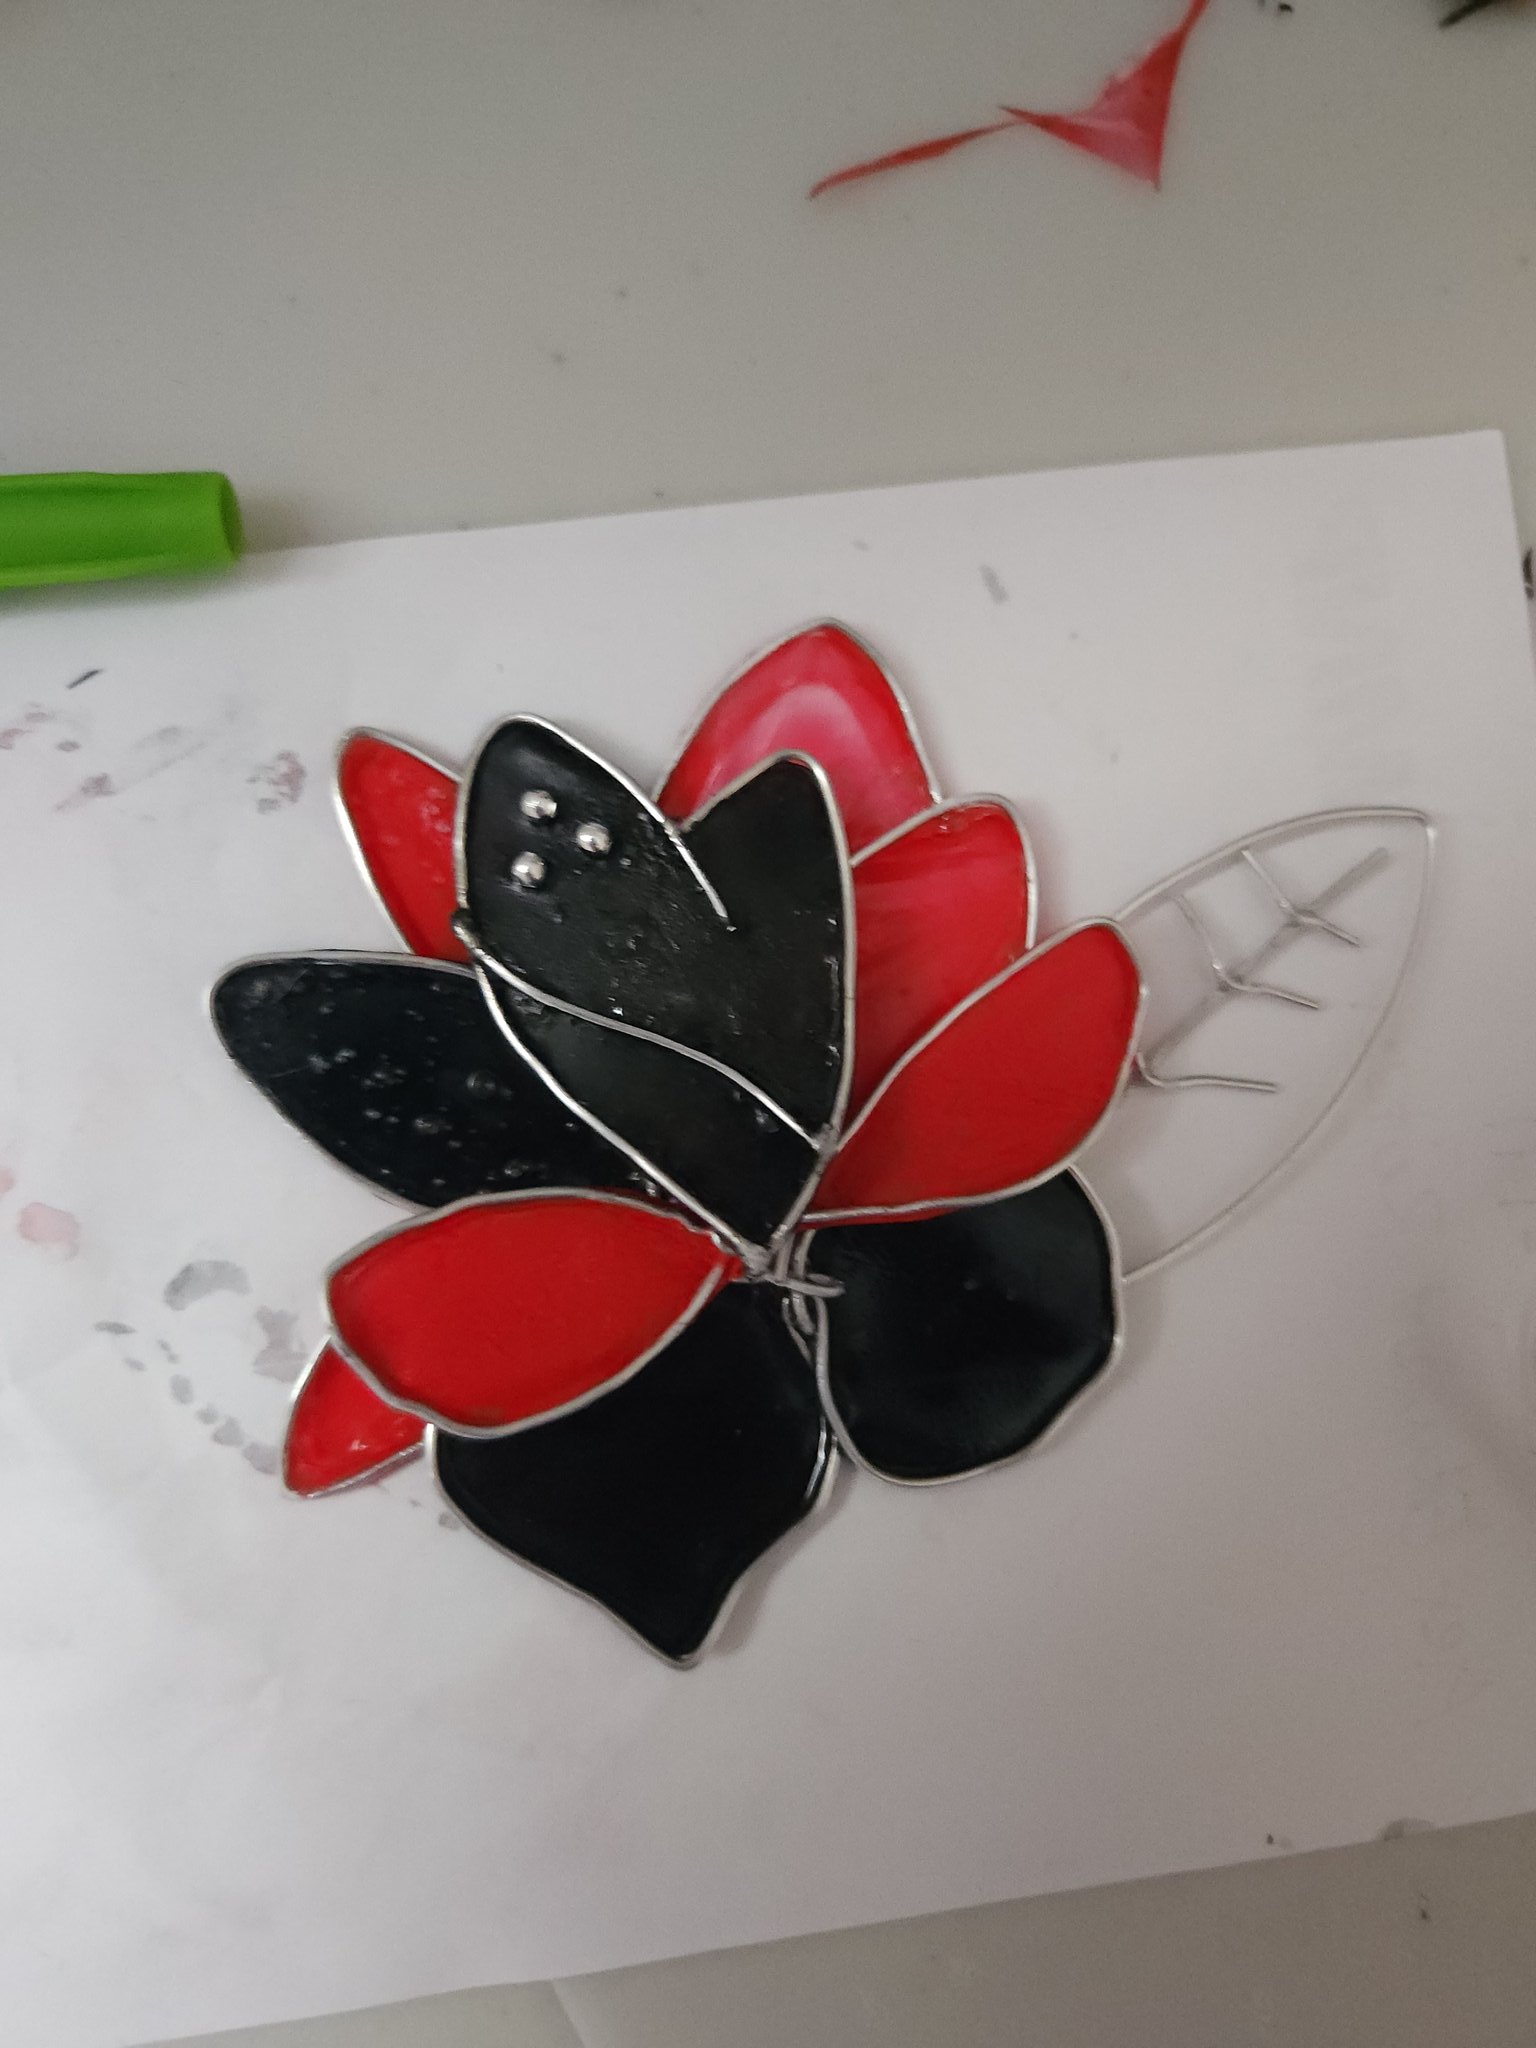
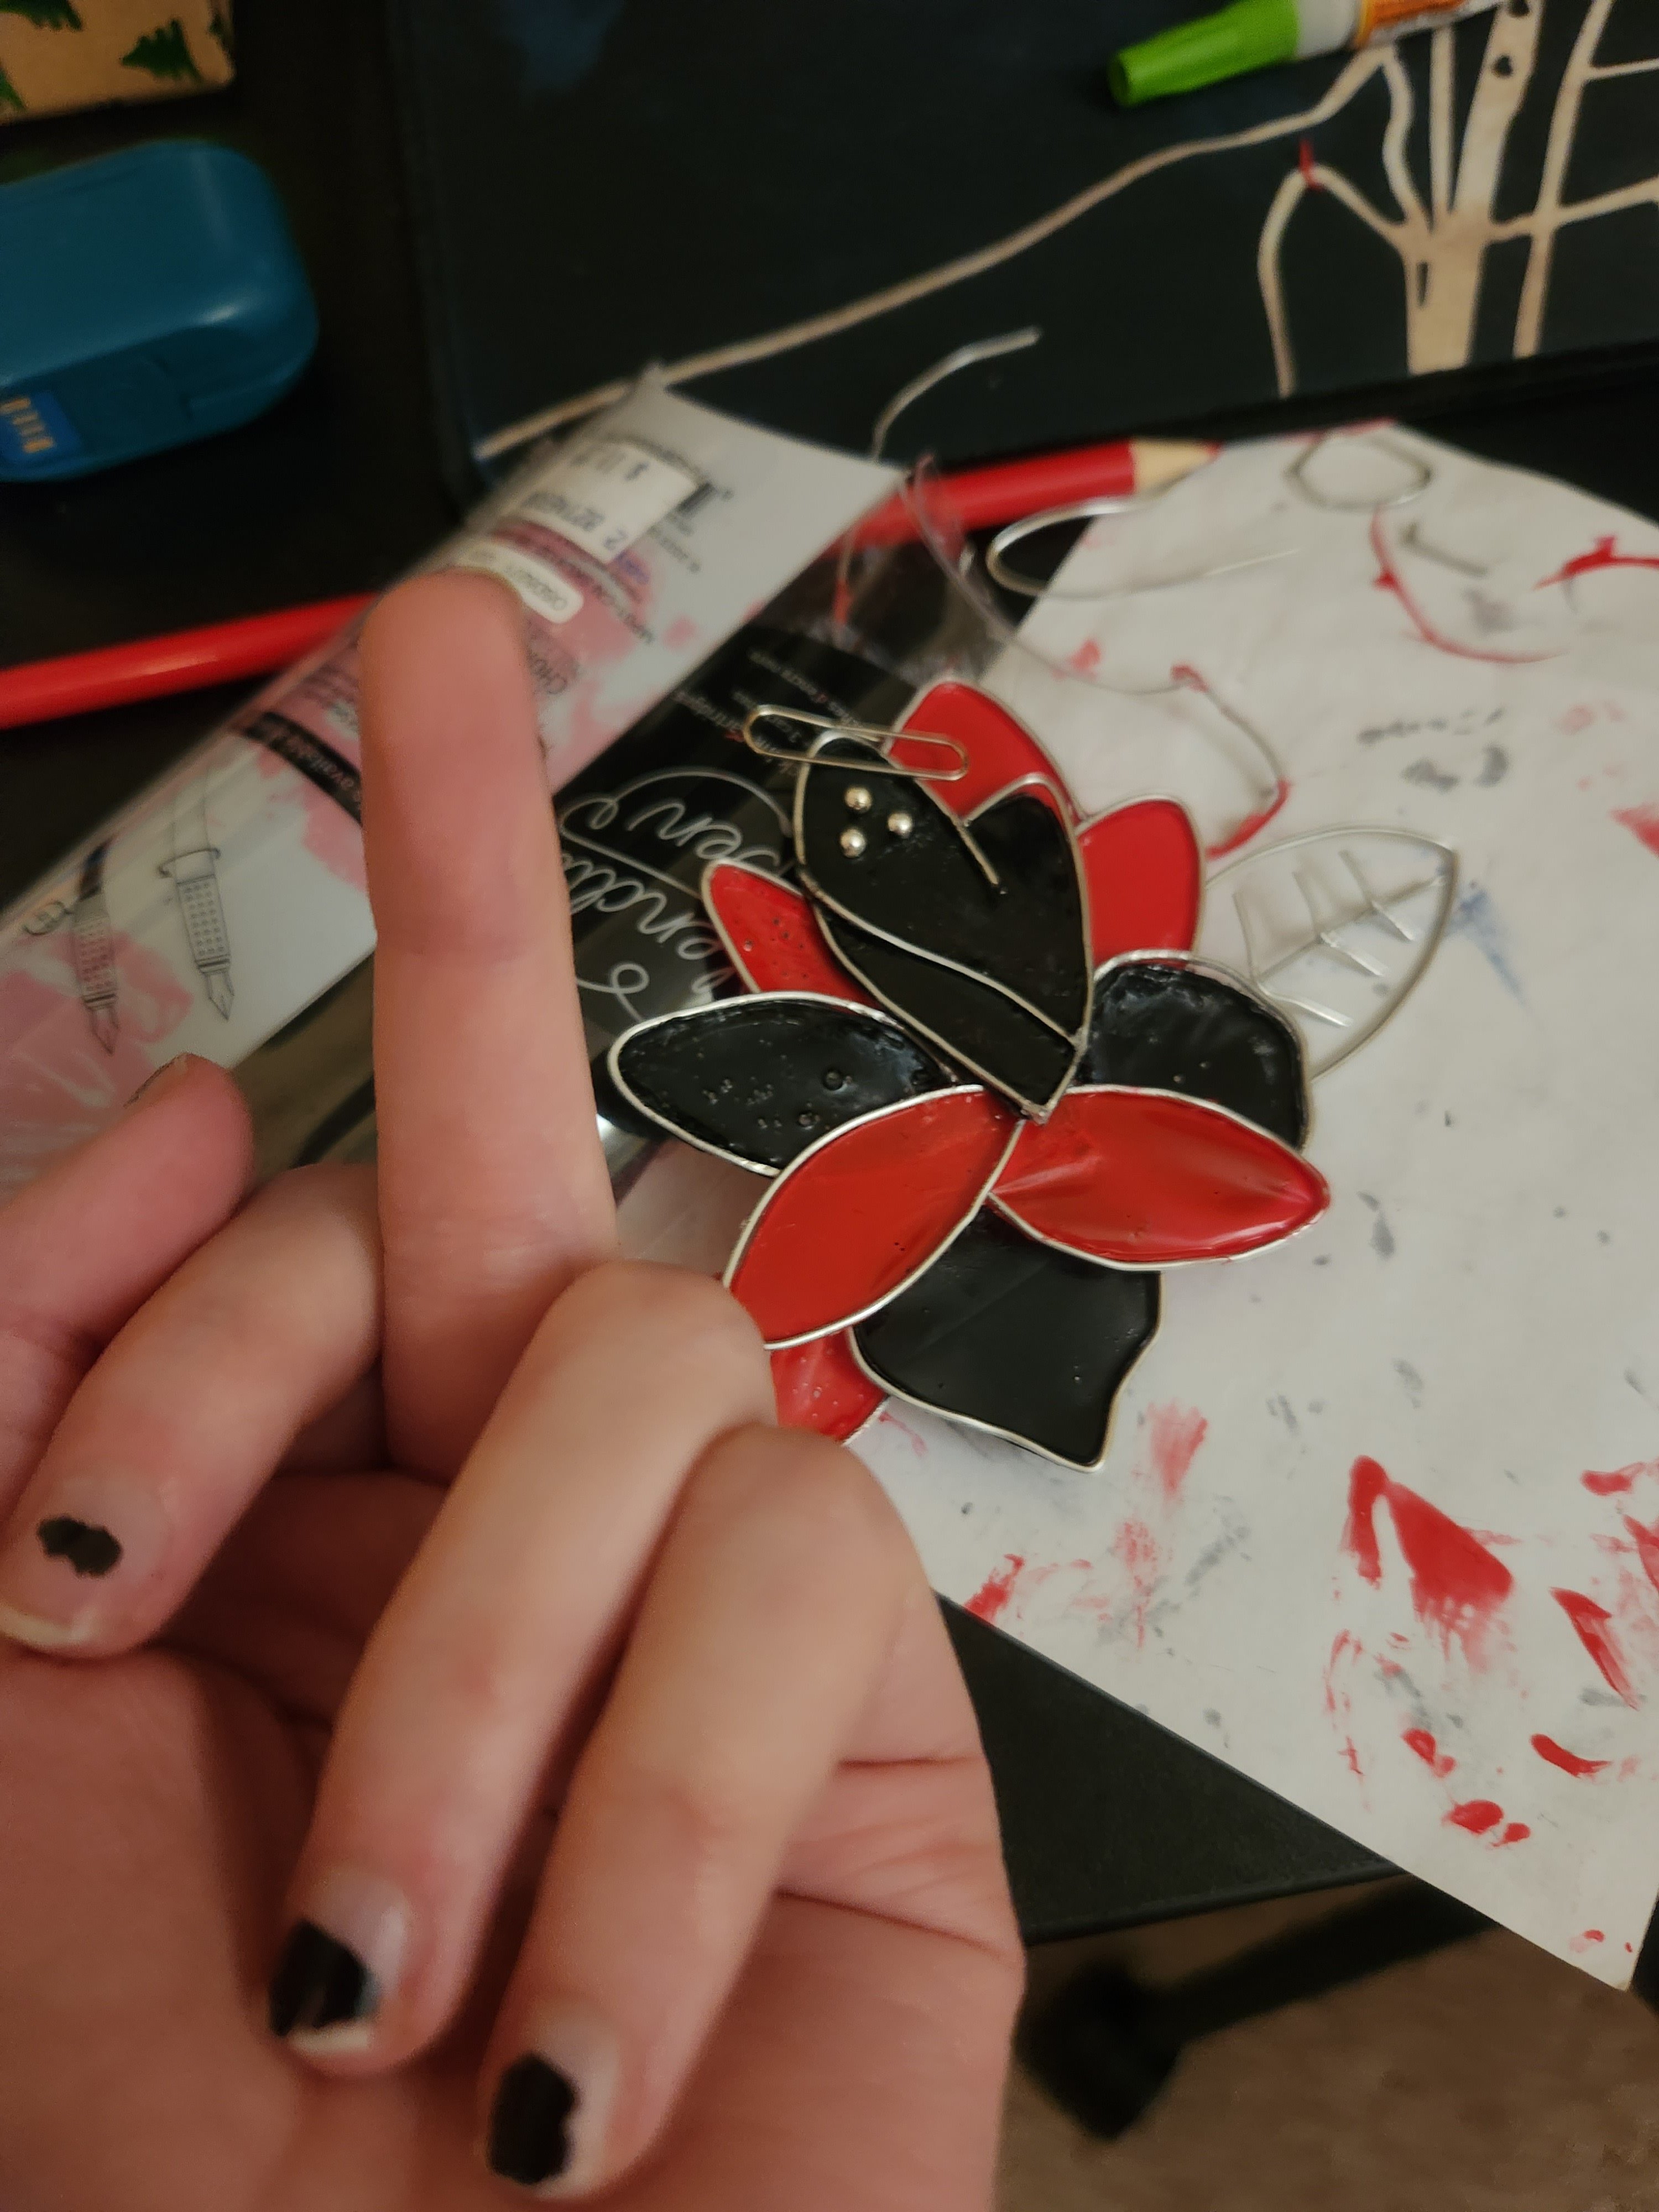
so that was basically a nightmare. after getting each petal made, i just stacked them up and went to town with superglue. on the very back i made a little flat wire disc as a backing, and then attached a brooch/pin backing onto that, so i could pin it onto my vest. my brooch specifically was a bit big so i probably could have added a second pin backing to make sure it was more secure, but it ended up holding up for me :')
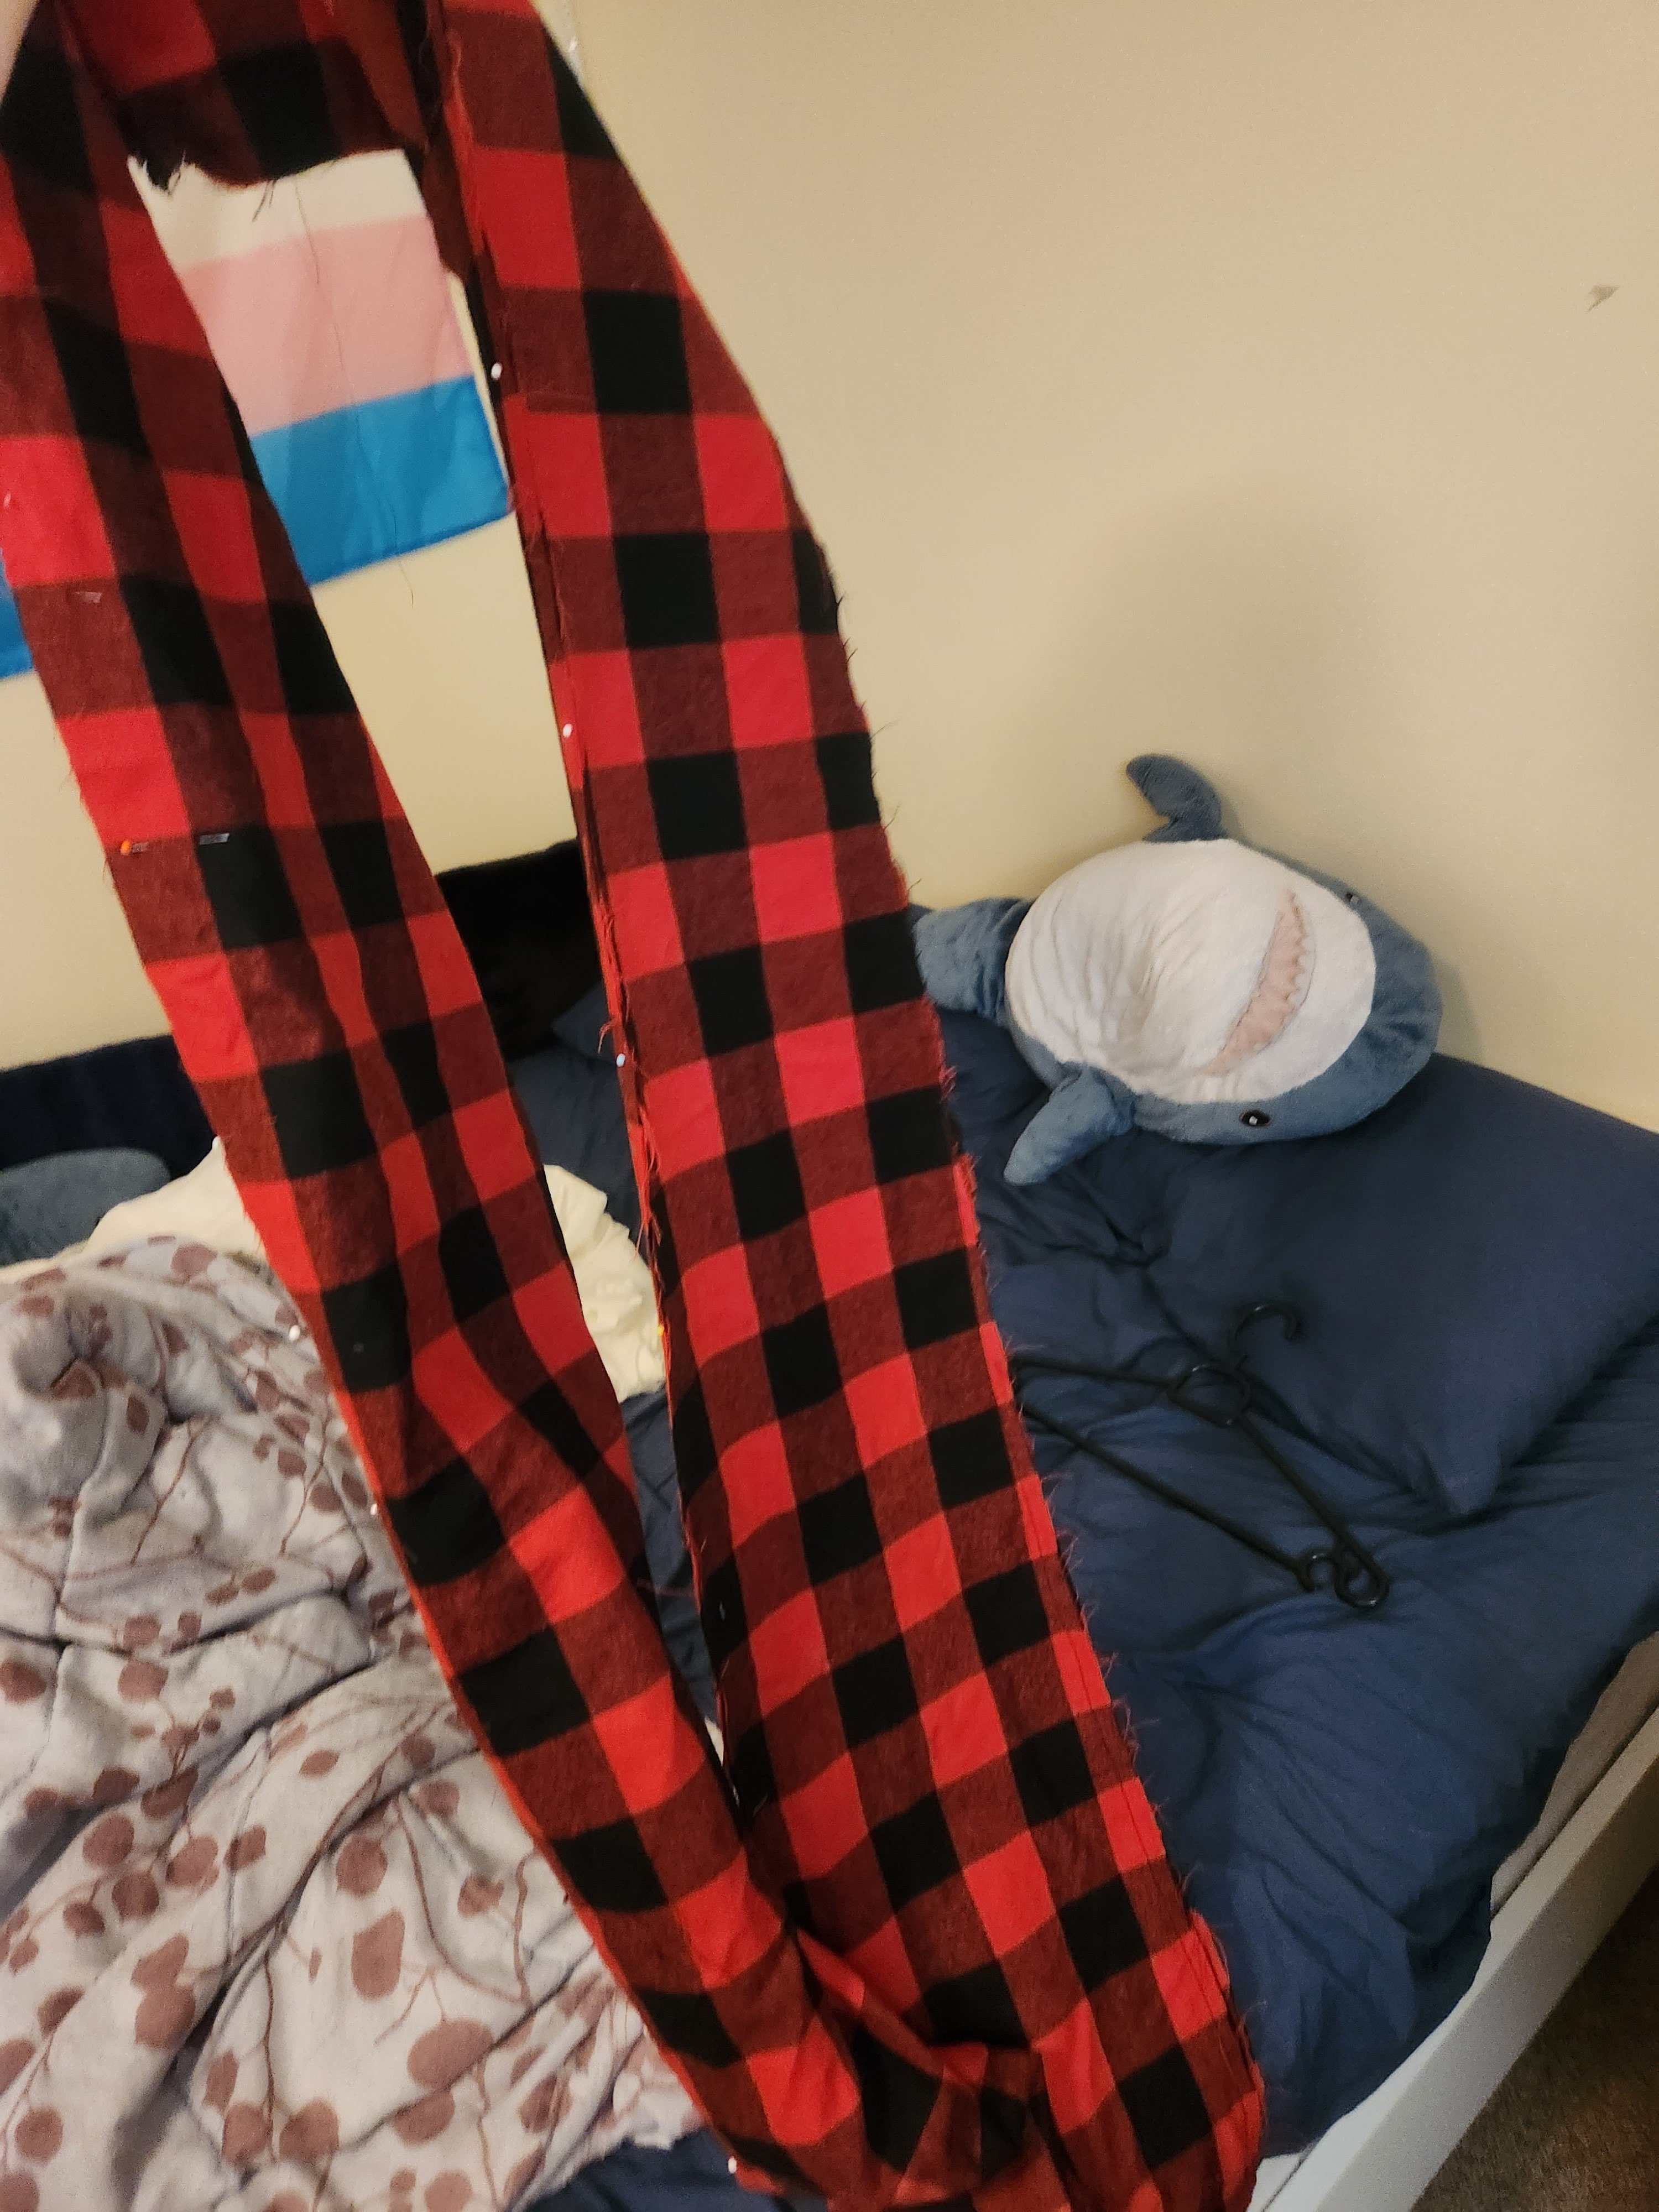
finally it's time for the pipe and the scarf!! let's do the scarf first because it is super easy. i just made a big tube and sewed it LOL. i wanted the length and narrowness in particular, but the fabric i had left something to be desired; i think a knit or a even something silky would have been more fun and flowy. but this worked just fine for me. i also wanted to add a stealthy pocket into the seam of the scarf but i ran out of time :( (i love putting pockets in every concieveable garment). this scarf also didn't end up having tassels like canon. i should probably remake this tbqh.

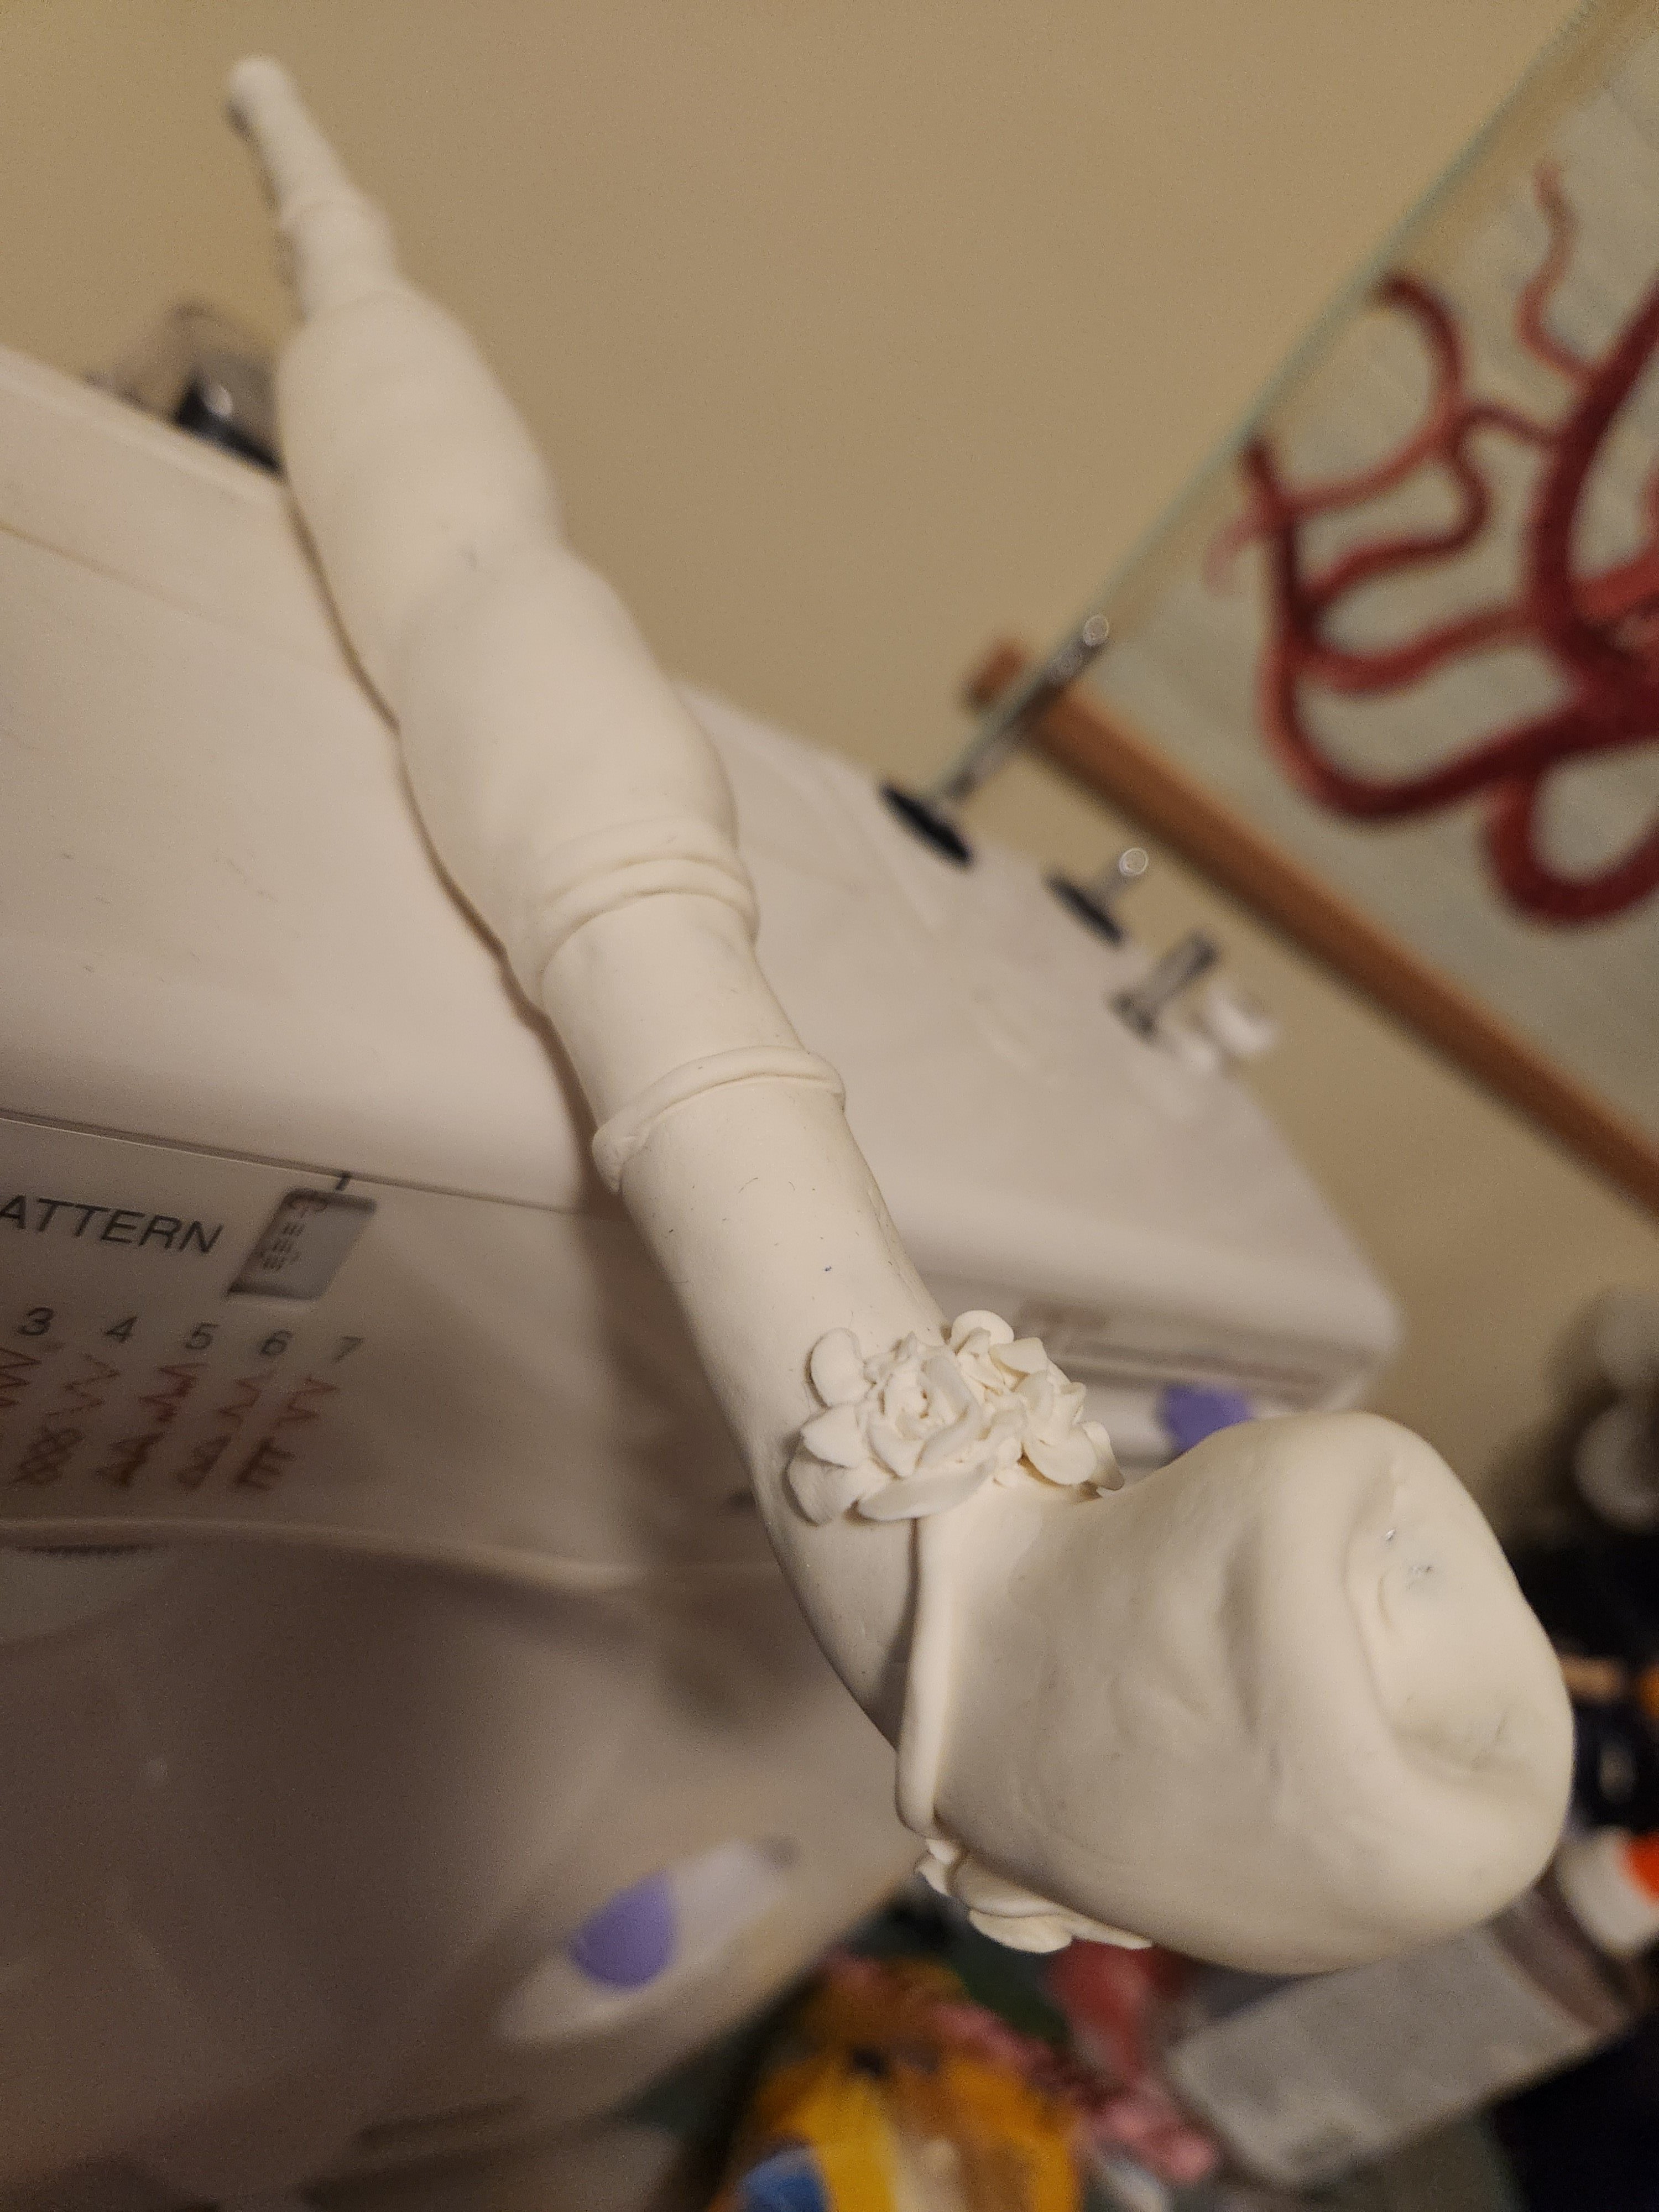
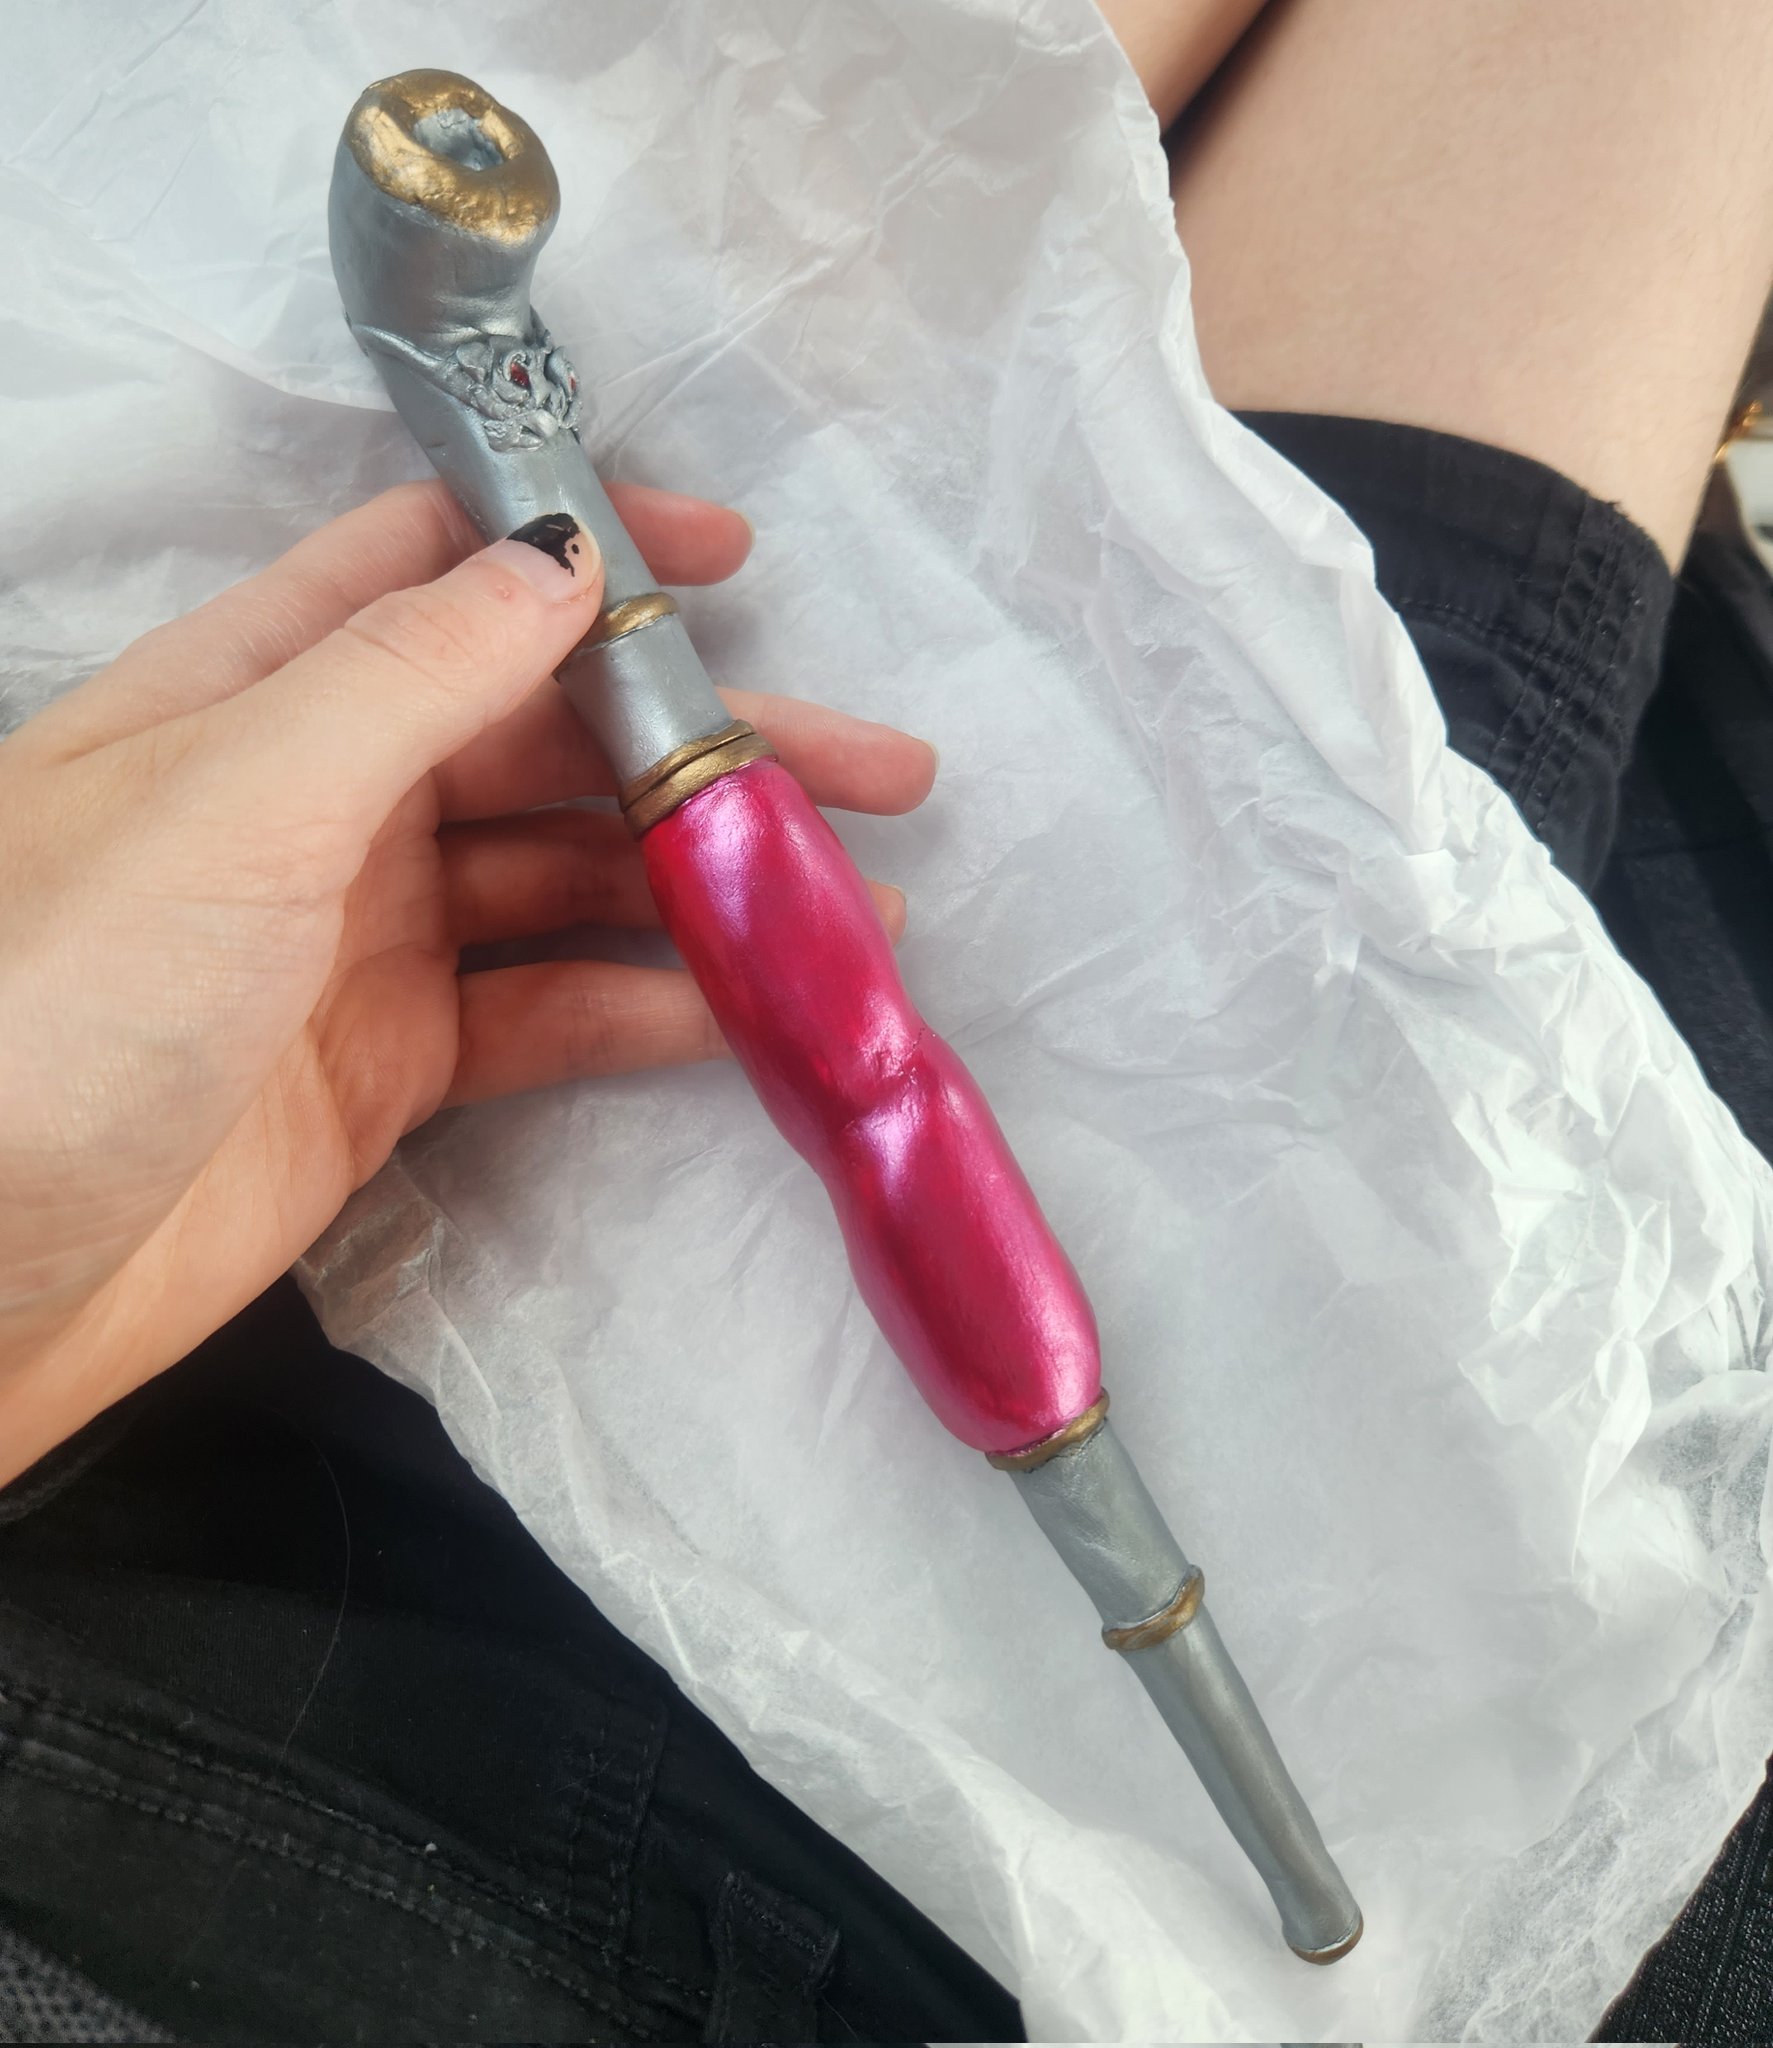
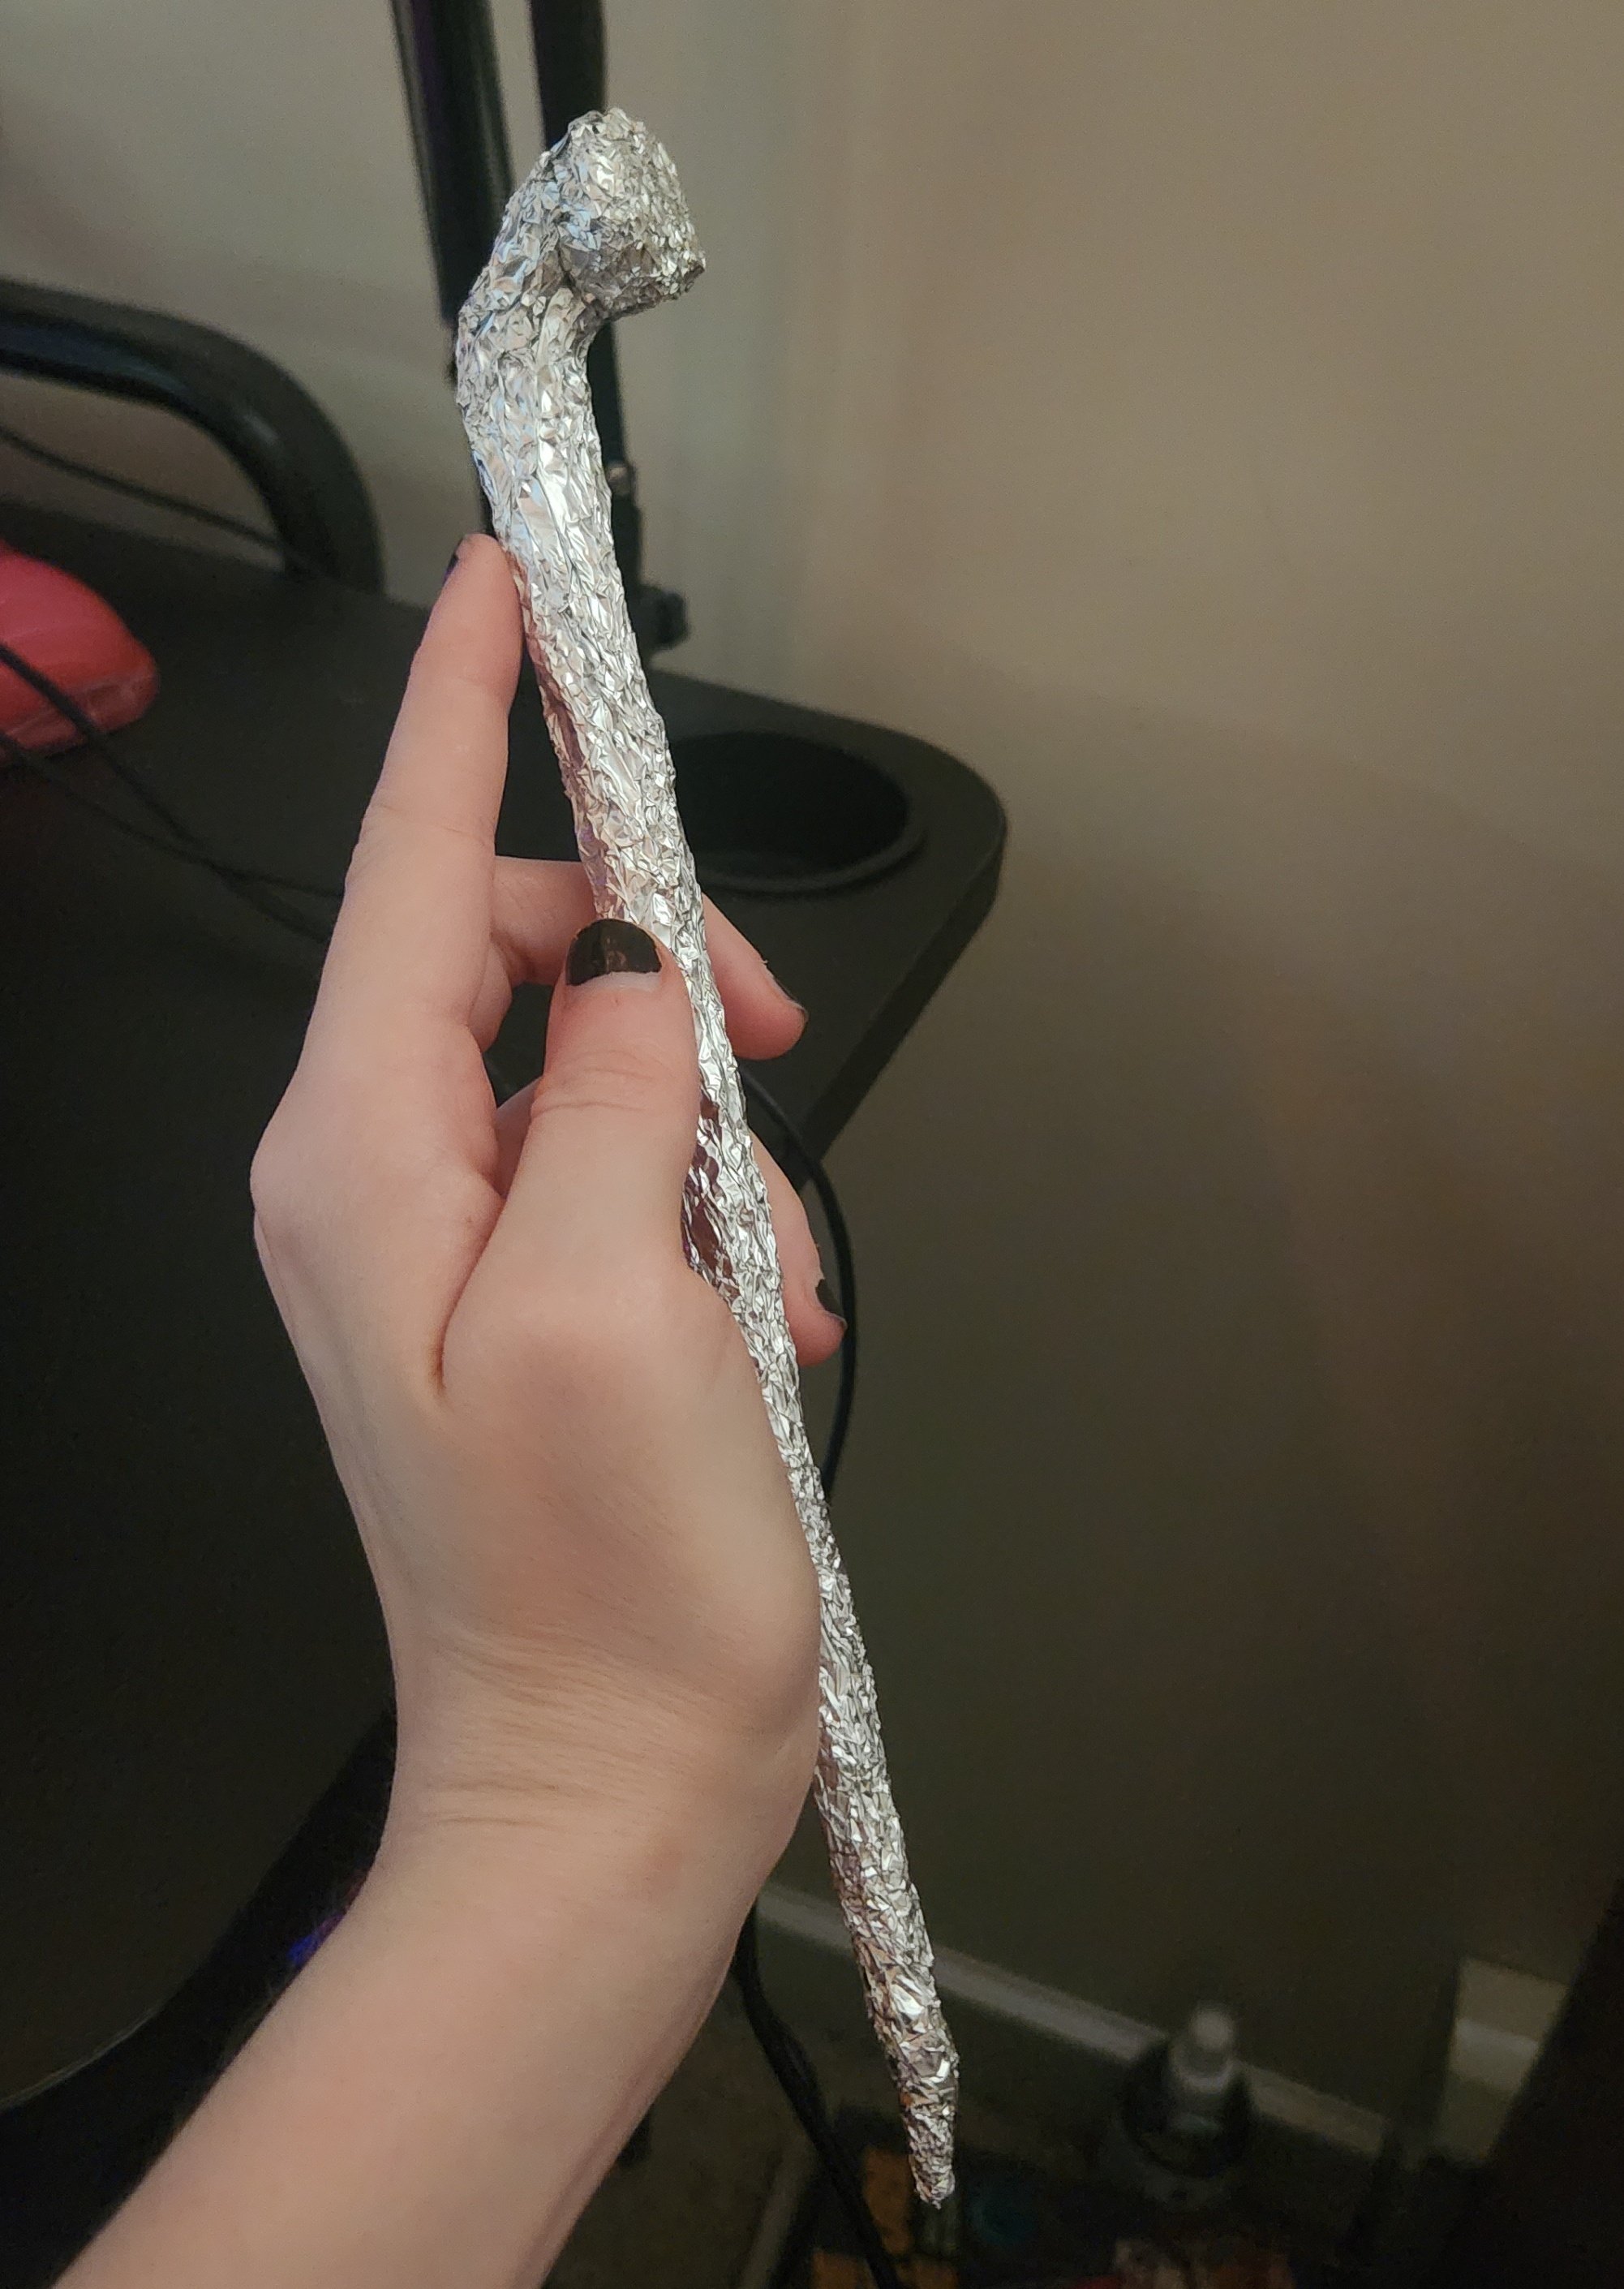
PIPE!!!! i used a tin foil base over a clean disposable chopstick for the general shape. then i sculpted model magic over it and let it air dry. since model magic is hard to use for fine detailing, i did what i could with it, and the rest would be etched or painted in later. despite that i think i managed to get a good amount of detail with the roses and vines!! then, finally, i used acrylic paint to put on colors. hilariously i ran out of time to do the etchings/paintings for the pipe detailing anyways so it ended up looking a bit plain but.... that's another upgrade for later i guess o7
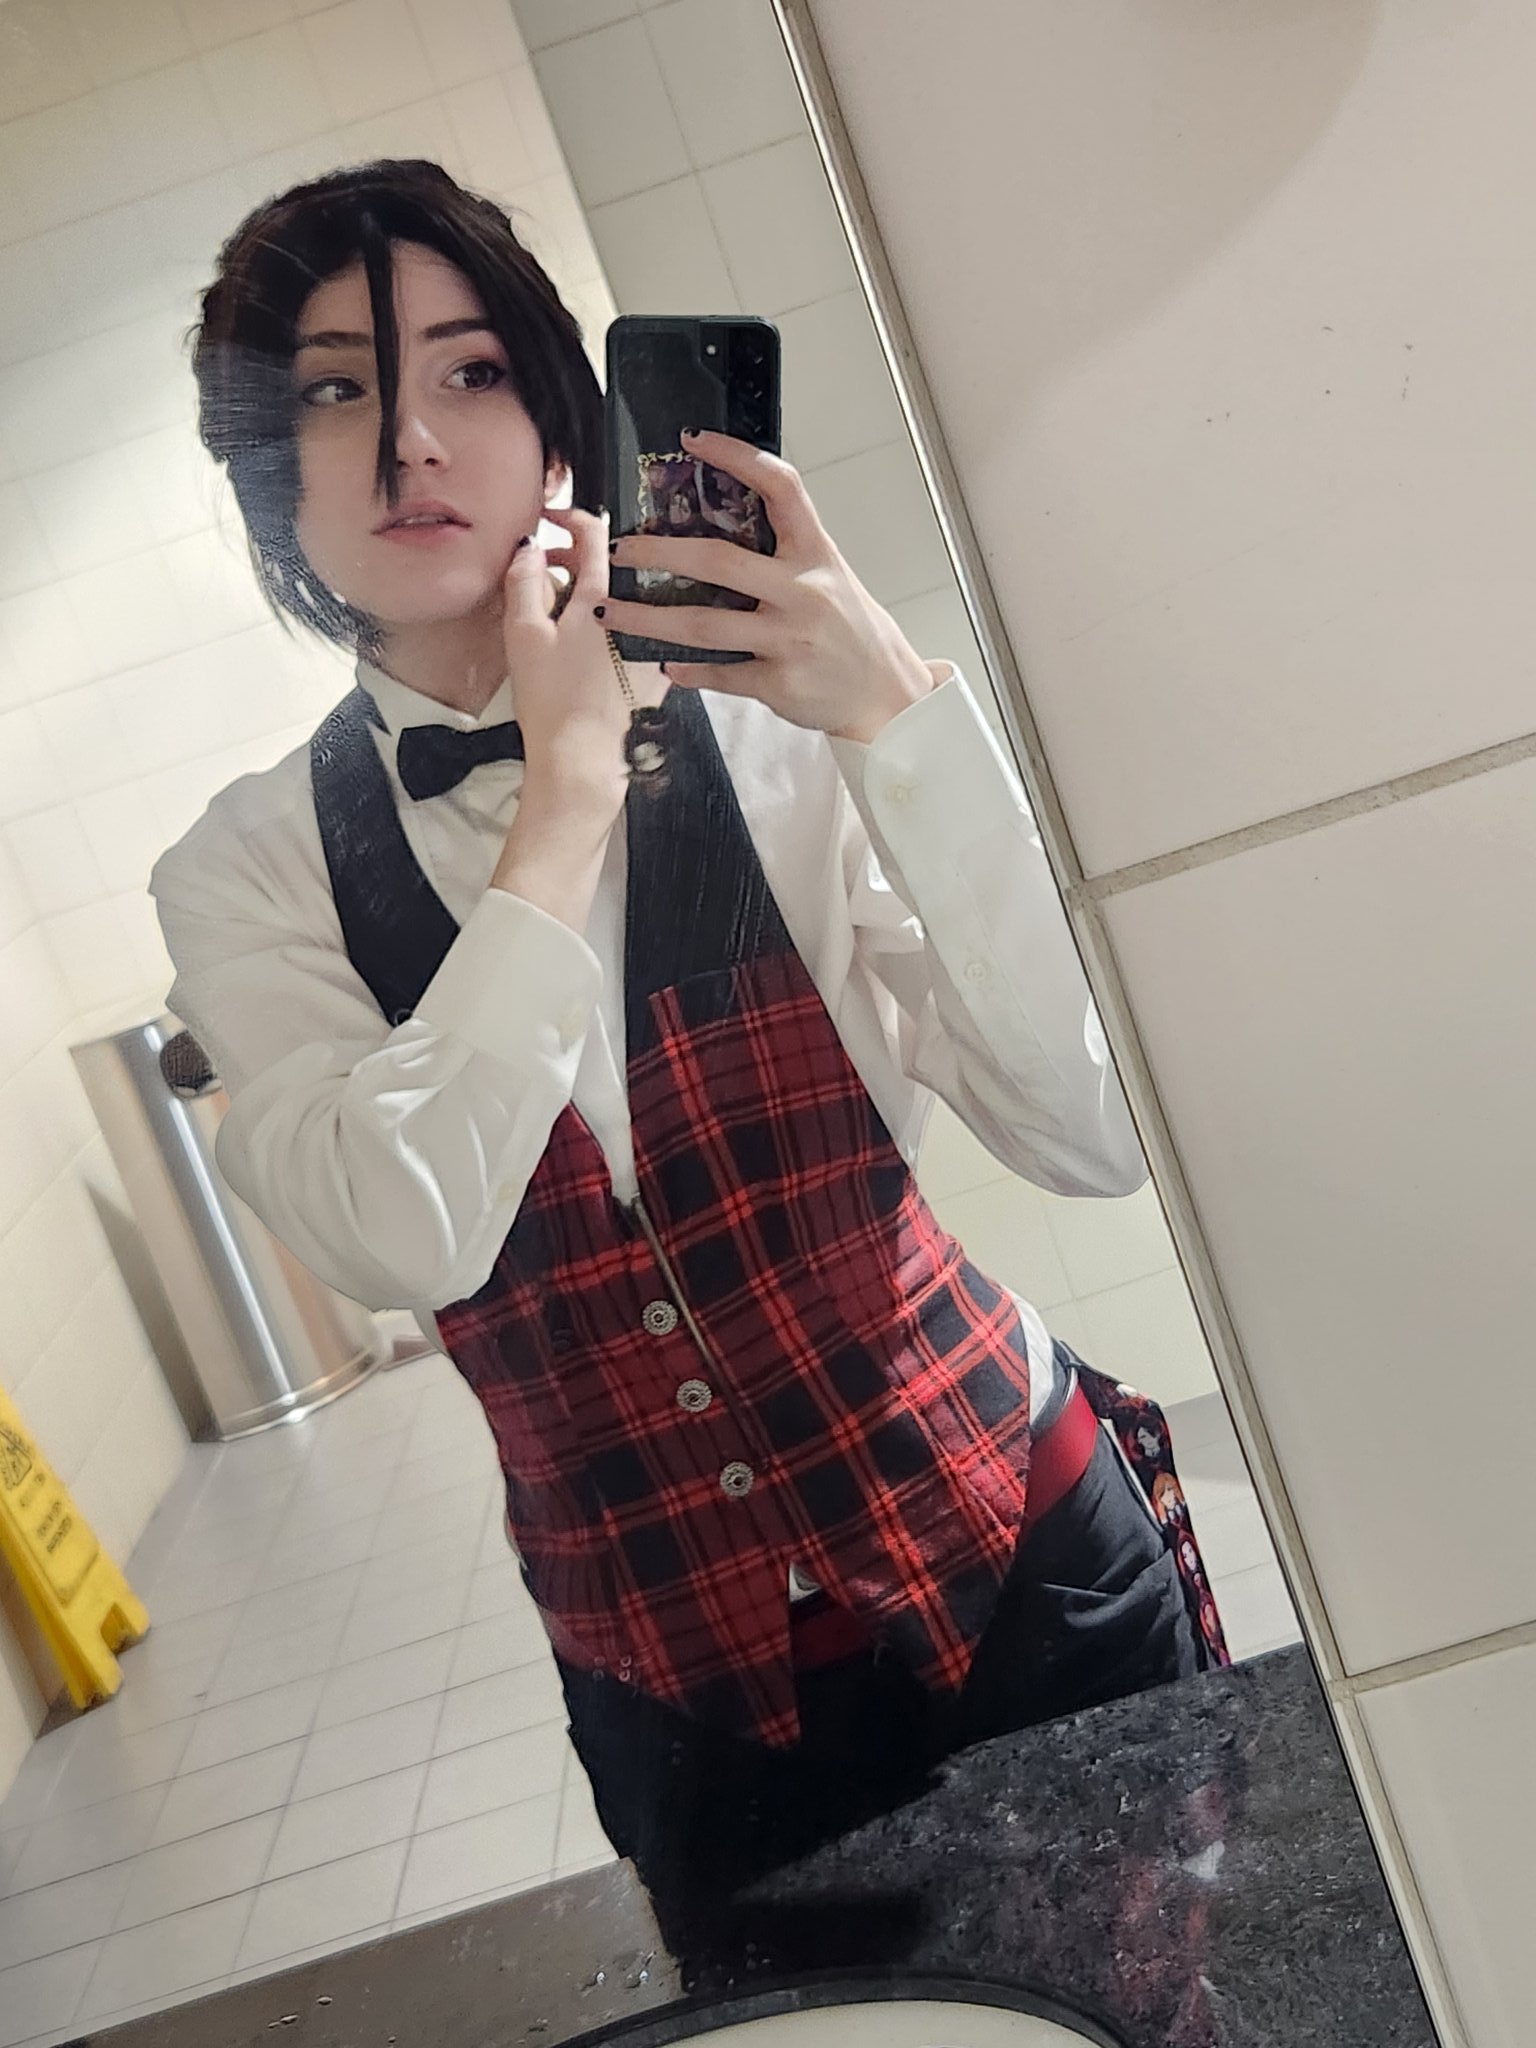
and there you have it!! so much trial and error for such a simple build but it was a lot of fun; i had a lot more creative freedom and had to do a lot more problem-solving and freehanding than i had done before. anything for my beautiful wine-loving wife!!!!


